Camera Calibration
Overview
This tutorial shows how to obtain calibration parameters for monocular camera.
Requirements
-
First, source your ROS 2 installation to set the environment variables:
source /opt/ros/lyrical/setup.bash -
Install Camera Calibration Parser, Camera Info Manager and Launch Testing Ament Cmake:
sudo apt install ros-$ROS_DISTRO-camera-calibration-parsers sudo apt install ros-$ROS_DISTRO-camera-info-manager sudo apt install ros-$ROS_DISTRO-launch-testing-ament-cmake -
Image Pipeline need to be built from source in your workspace with:
git clone -b $ROS_DISTRO git@github.com:ros-perception/image_pipeline.git
Also, make sure you have the following:
- A large checkerboard with known dimensions. This tutorial uses a 7x9 checkerboard with 20mm squares. Calibration uses the interior vertex points of the checkerboard, so an "8x10" board uses the interior vertex parameter "7x9" as in the example below. The checkerboard with set dimensions can be downloaded from here.
- A well-lit area clear of obstructions and other check board patterns
- A monocular camera publishing images over ROS
Tutorial Steps
-
Start a terminal in your GUI
-
Launch the ROS driver for your specific camera.
-
Make sure camera is publishing images over ROS. This can be tested by running:
ros2 topic list -
This will show you all the topics published make sure that there is an image_raw topic /camera/image_raw. To confirm that its a real topic and actually publishing check topic hz:
ros2 topic hz /camera/image_raw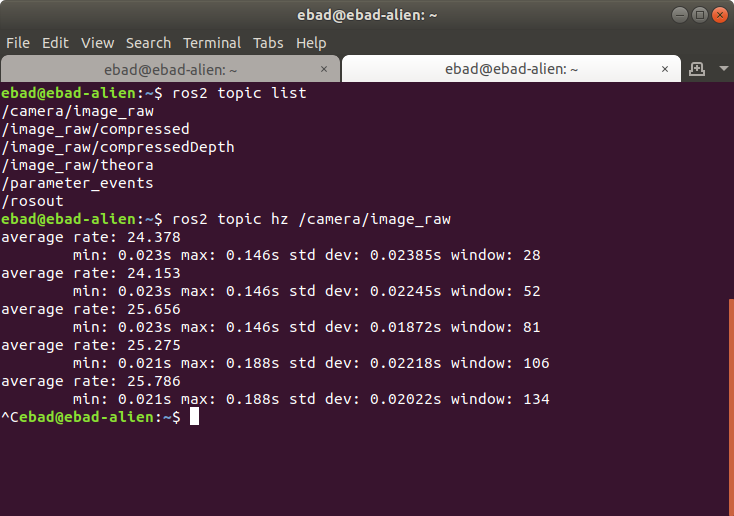
-
Start the camera calibration node
ros2 run camera_calibration cameracalibrator --size 7x9 --square 0.02 --ros-args -r image:=/my_camera/image_raw -p camera:=/my_cameraCamera Name: -c, --camera_name name of the camera to appear in the calibration file Chessboard Options: You must specify one or more chessboards as pairs of --size and--square options. -p PATTERN, --pattern=PATTERN calibration pattern to detect - 'chessboard','circles', 'acircles','charuco' -s SIZE, --size=SIZE chessboard size as NxM, counting interior corners (e.g. a standard chessboard is 7x7) -q SQUARE, --square=SQUARE chessboard square size in meters ROS Communication Options: --approximate=APPROXIMATE allow specified slop (in seconds) when pairing images from unsynchronized stereo cameras --no-service-check disable check for set_camera_info services at startup Calibration Optimizer Options: --fix-principal-point fix the principal point at the image center --fix-aspect-ratio enforce focal lengths (fx, fy) are equal --zero-tangent-dist set tangential distortion coefficients (p1, p2) to zero -k NUM_COEFFS, --k-coefficients=NUM_COEFFS number of radial distortion coefficients to use (up to 6, default 2) --disable_calib_cb_fast_check uses the CALIB_CB_FAST_CHECK flag for findChessboardCorners This will open a calibration window which highlight the checkerboard.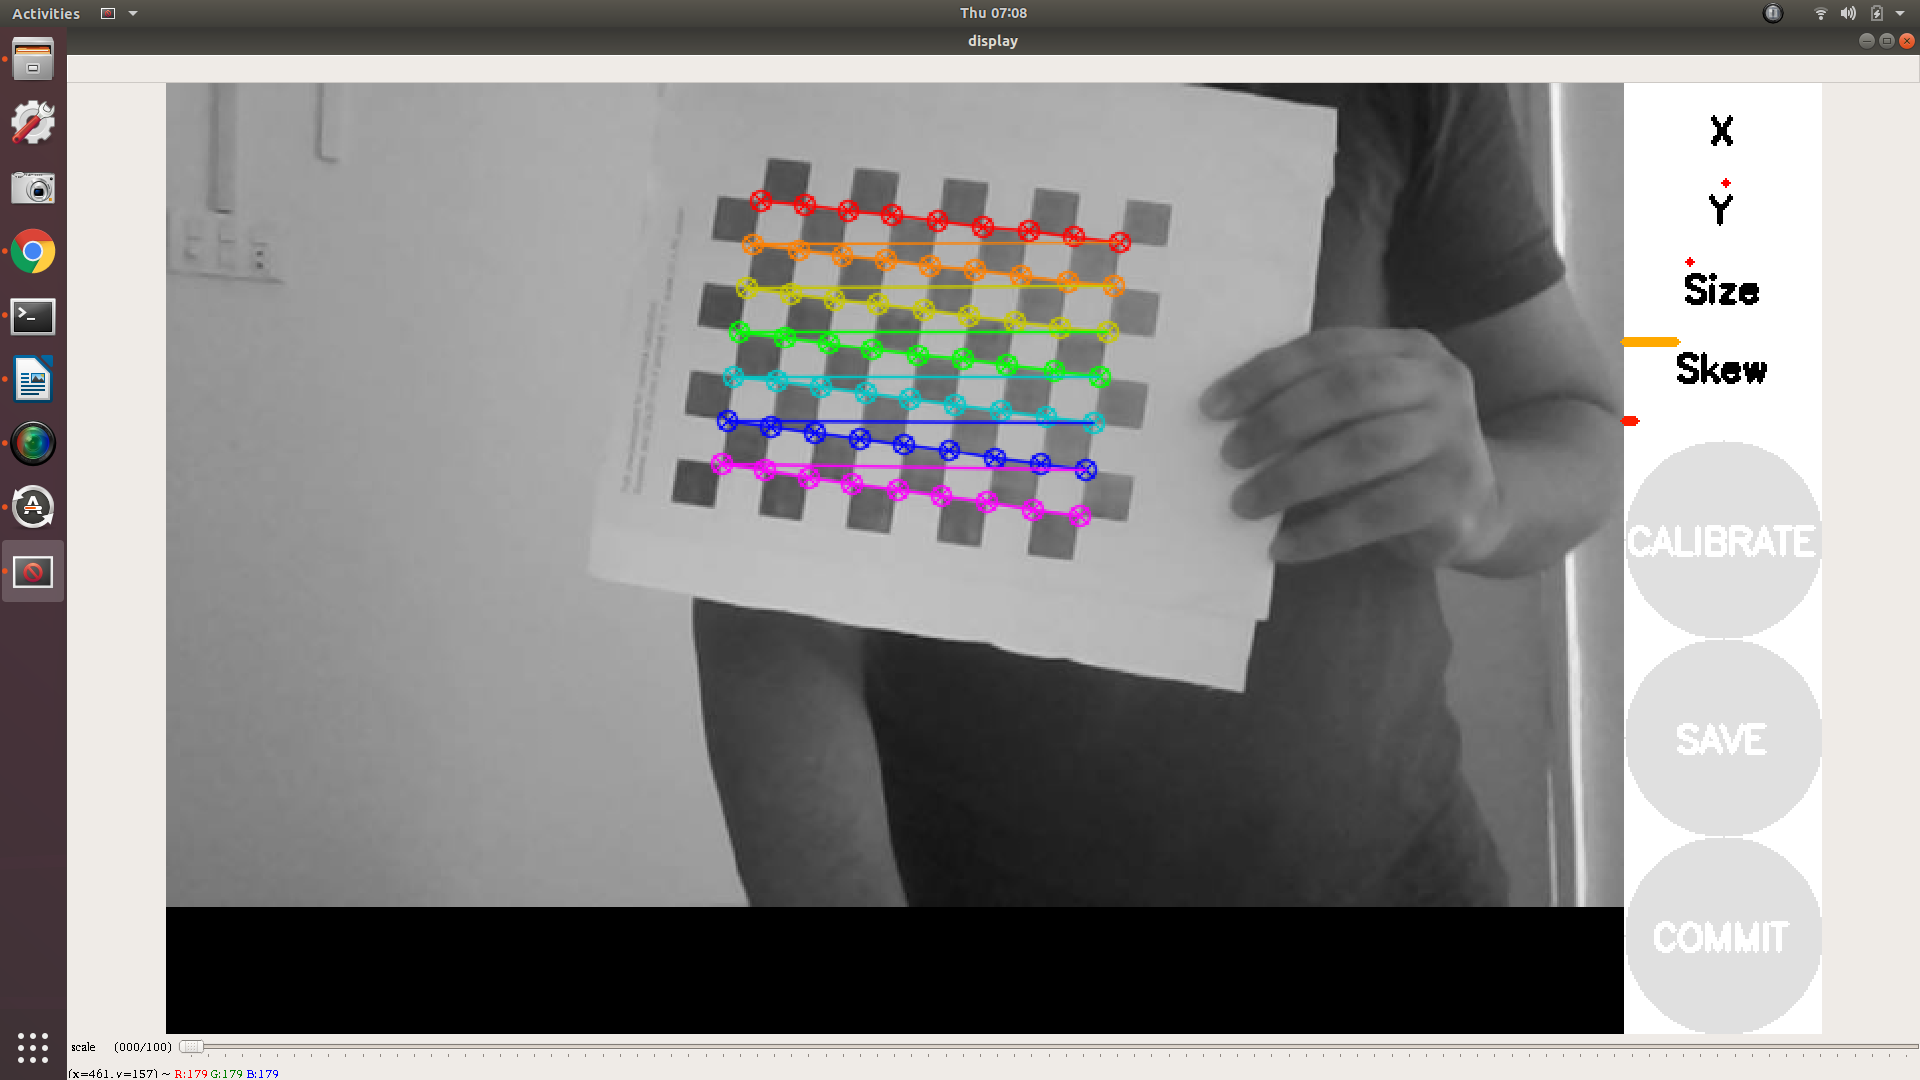
-
In order to get a good calibration you will need to move the checkerboard around in the camera frame such that:
- checkerboard on the camera's left, right, top and bottom of field of view
- X bar - left/right in field of view
- Y bar - top/bottom in field of view
- Size bar - toward/away and tilt from the camera
- checkerboard filling the whole field of view
- checkerboard tilted to the left, right, top and bottom (Skew)
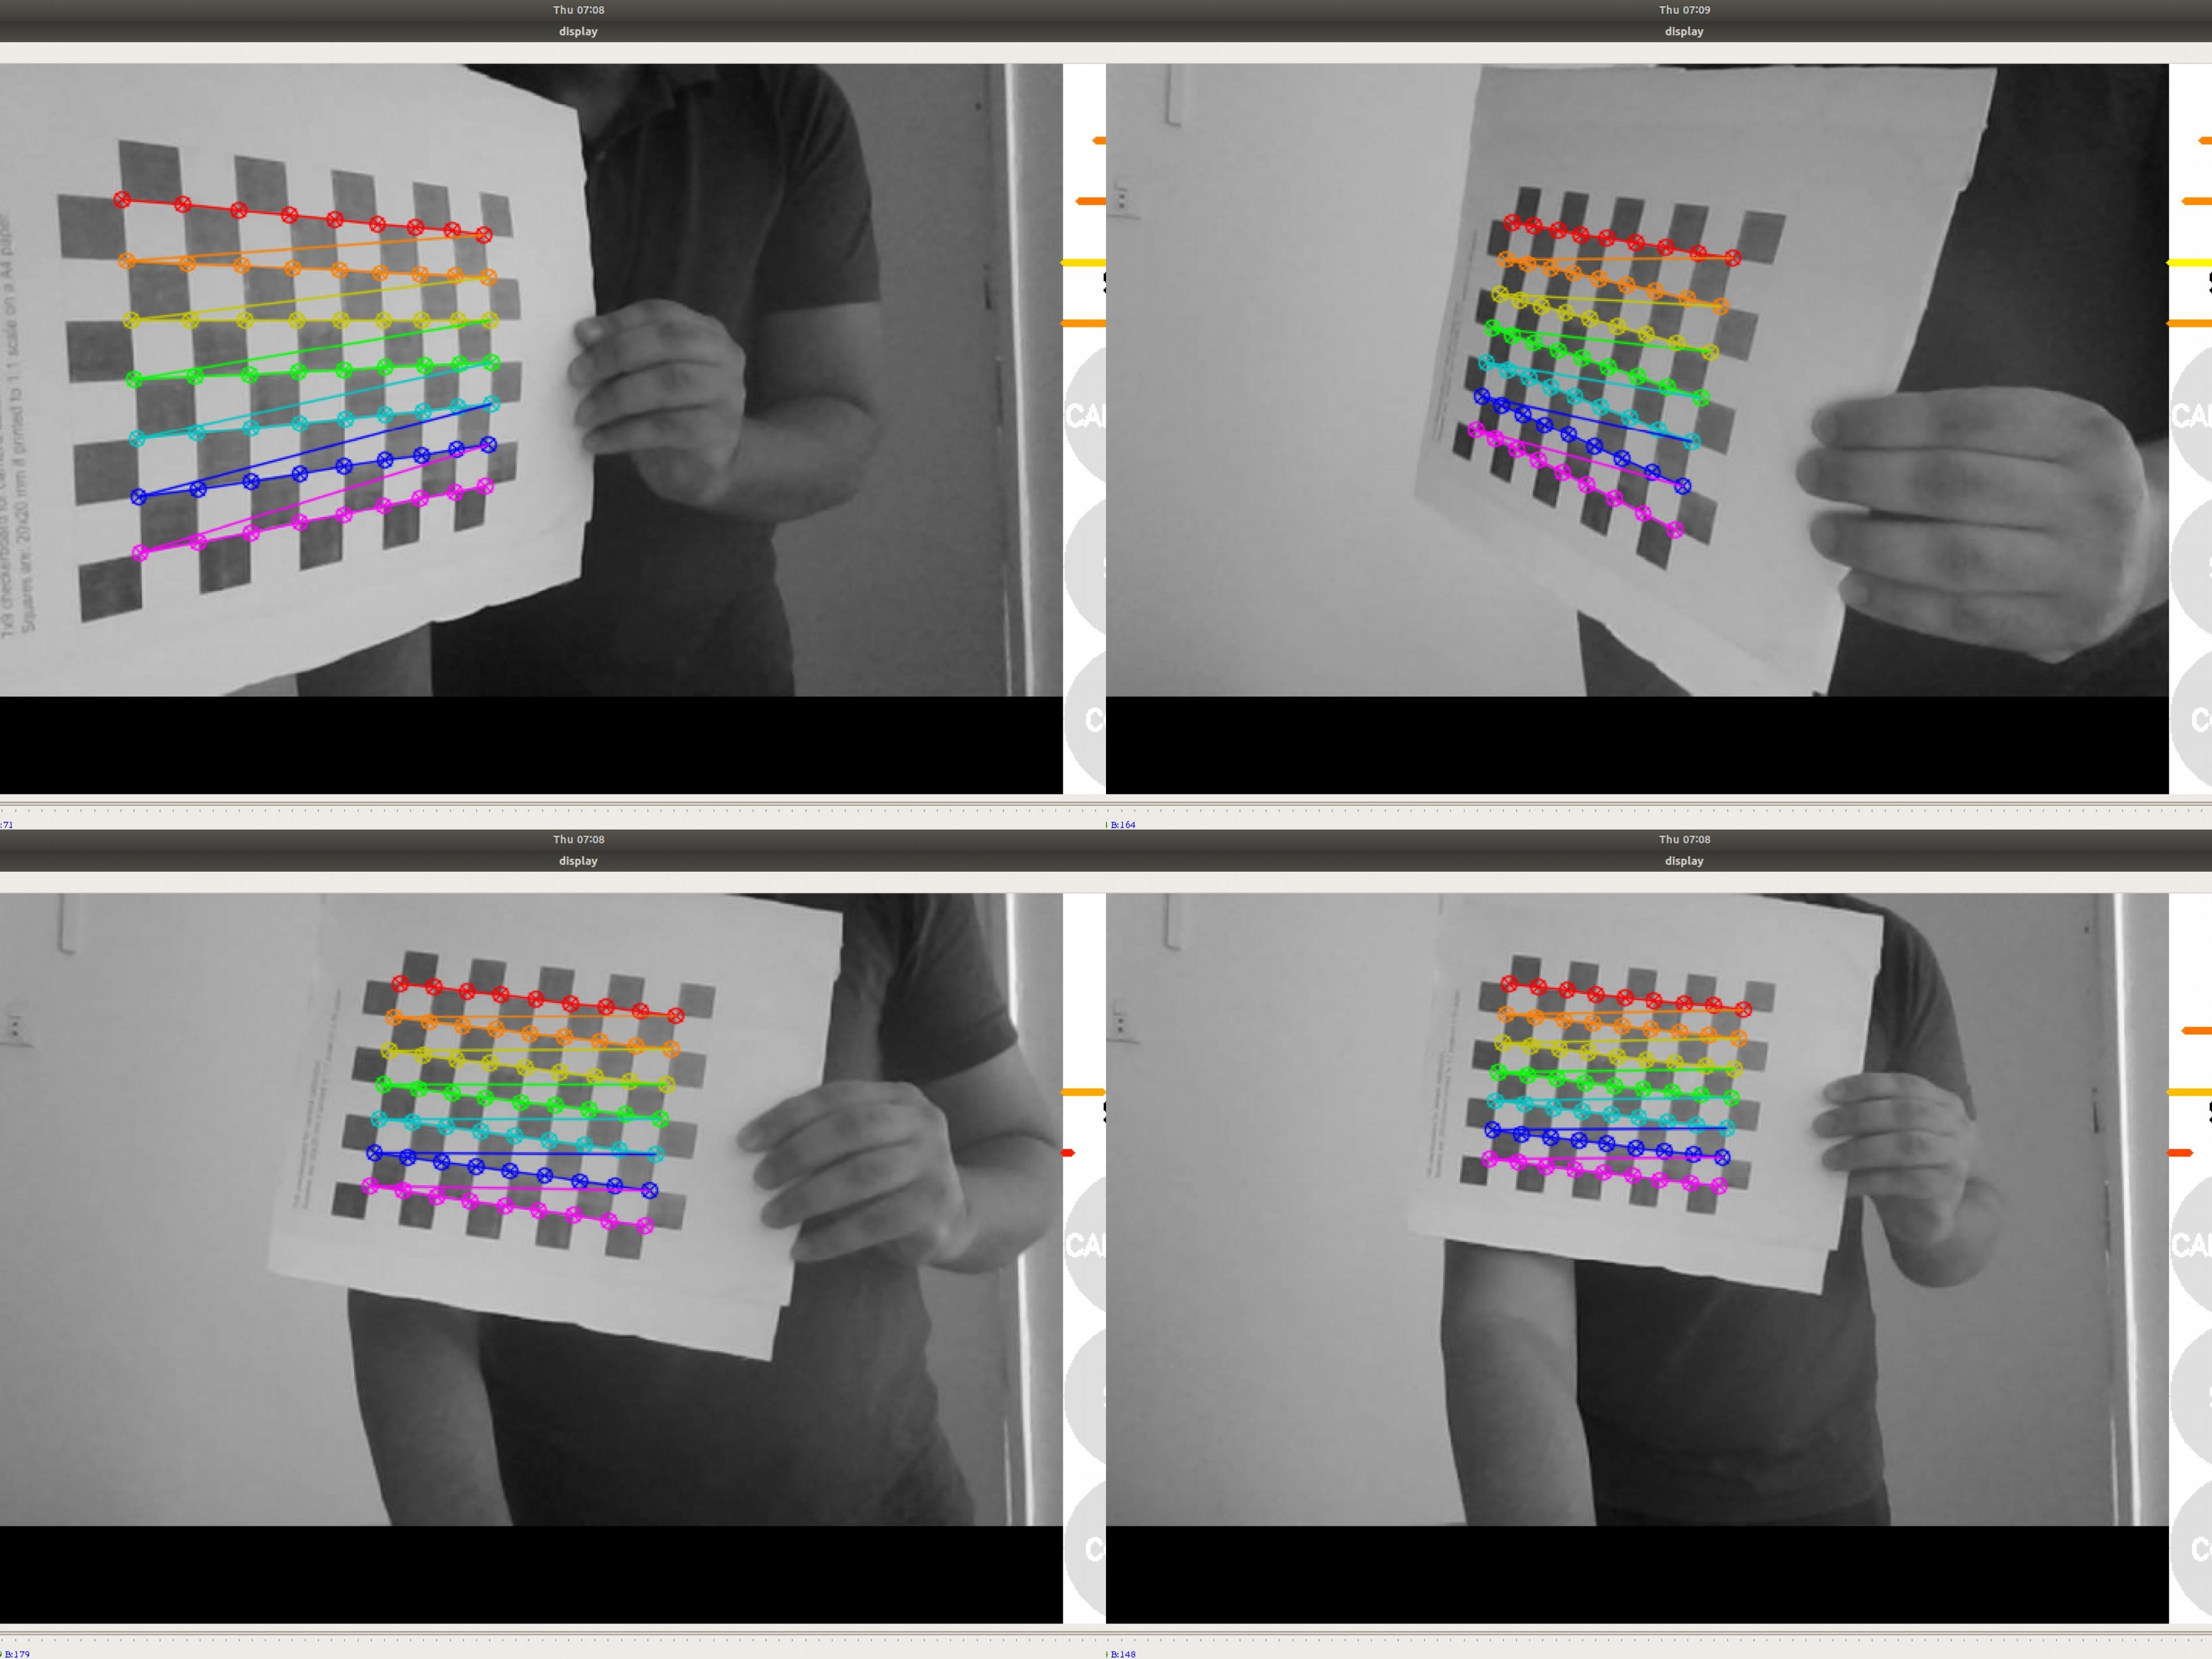
- checkerboard on the camera's left, right, top and bottom of field of view
-
As the checkerboard is moved around the 4 bars on the calibration sidebar increases in length. When all then the 4 bars are green and enough data is available for calibration the CALIBRATE button will light up. Click it to see the results. It takes around the minute for calibration to take place.
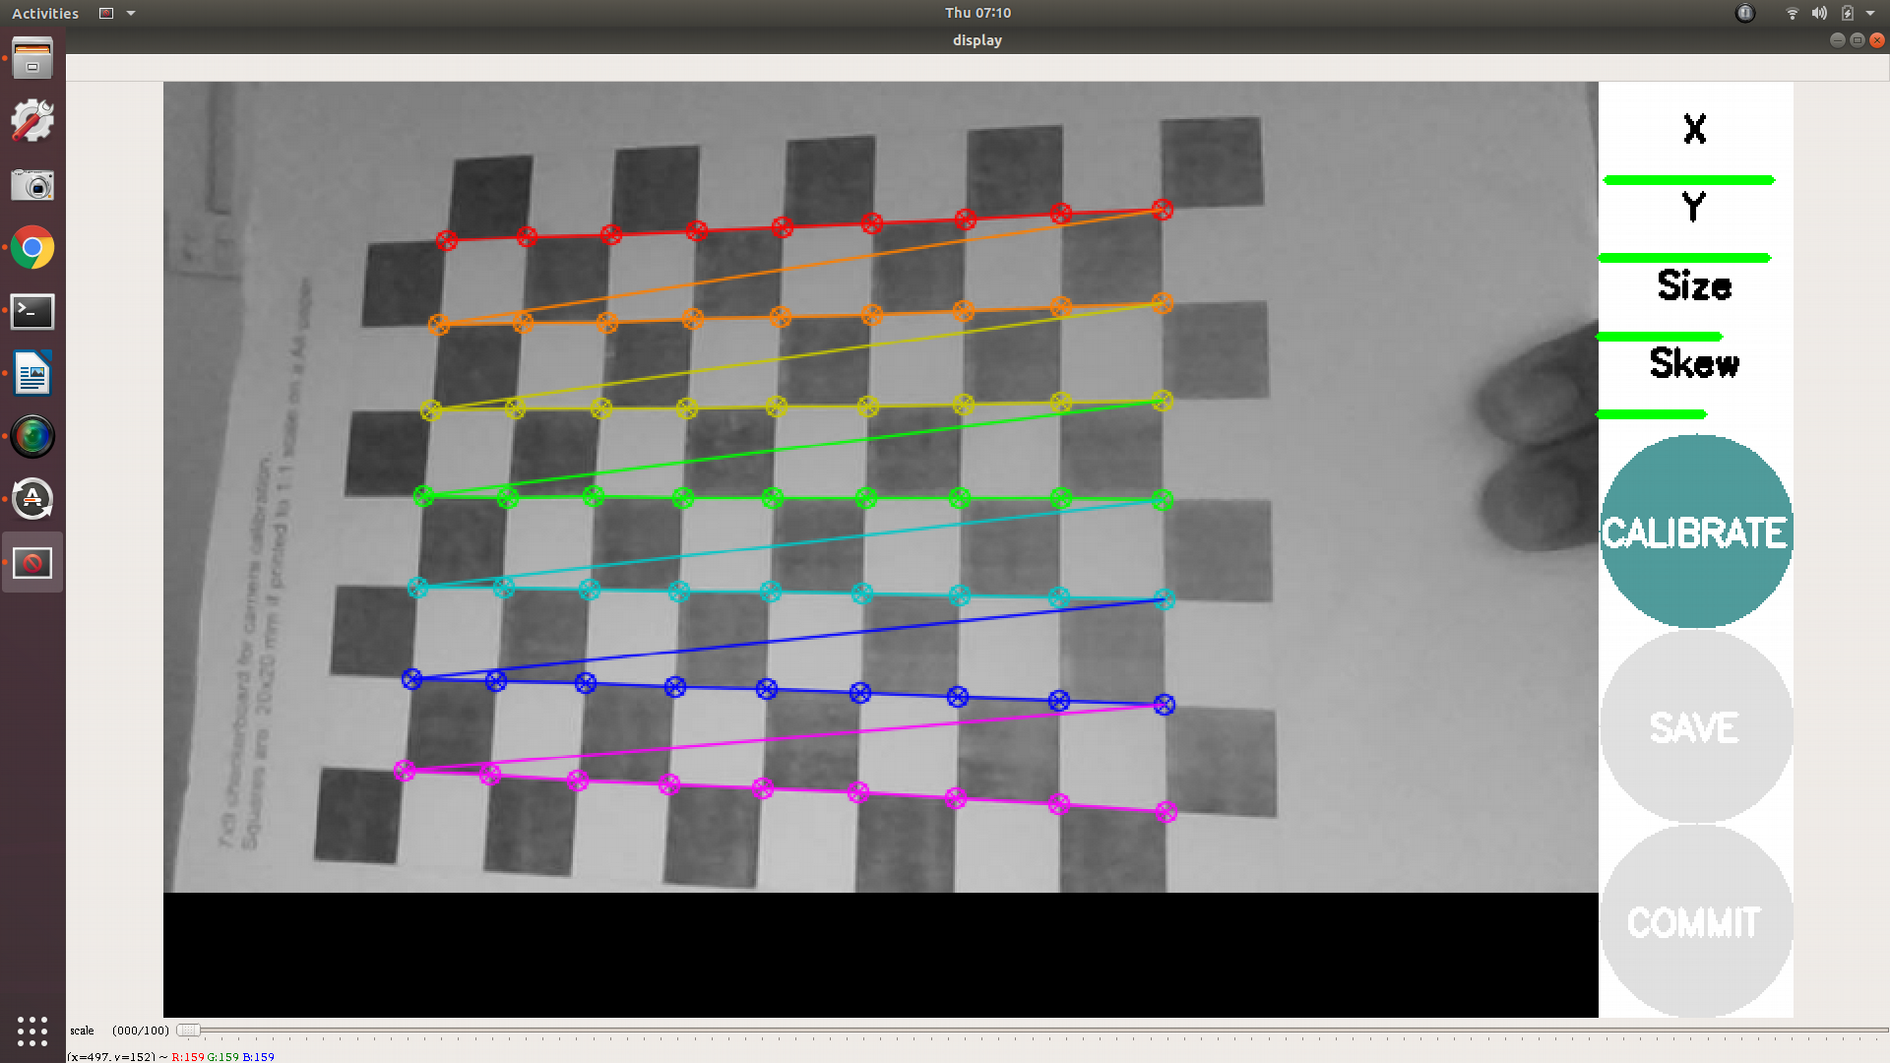
-
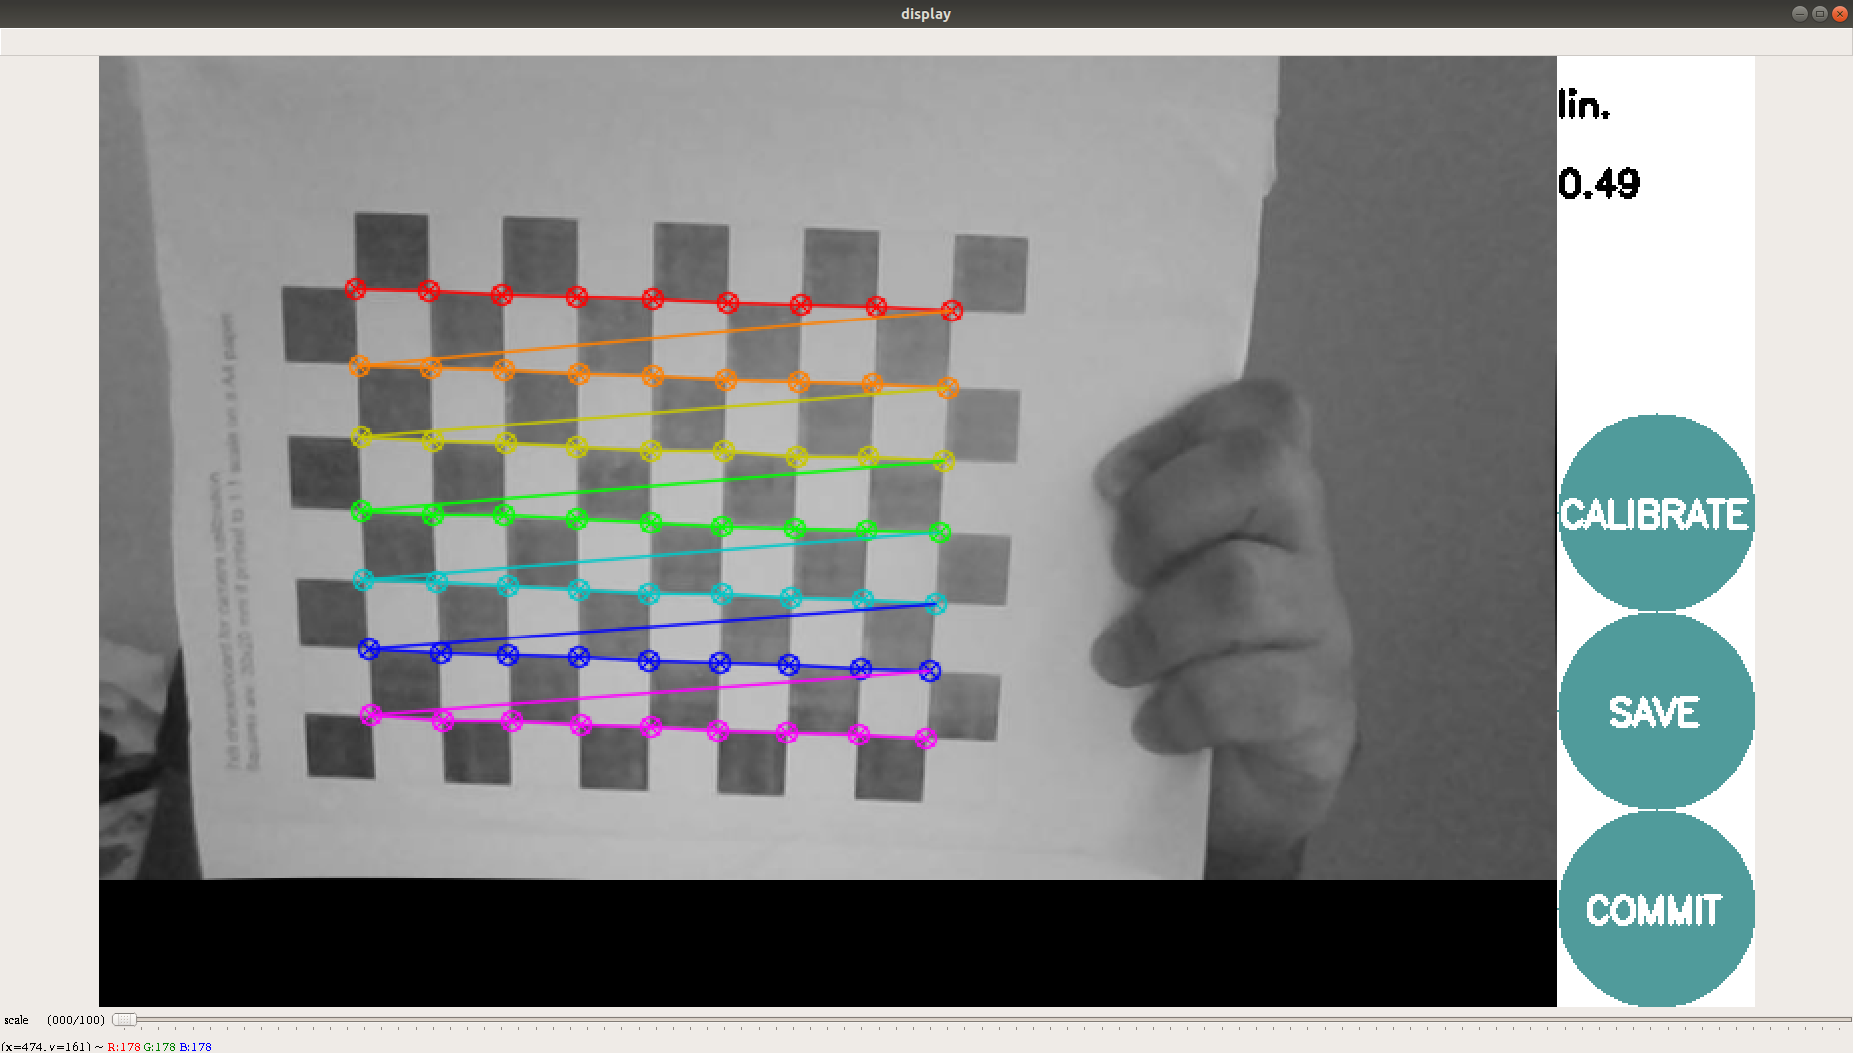
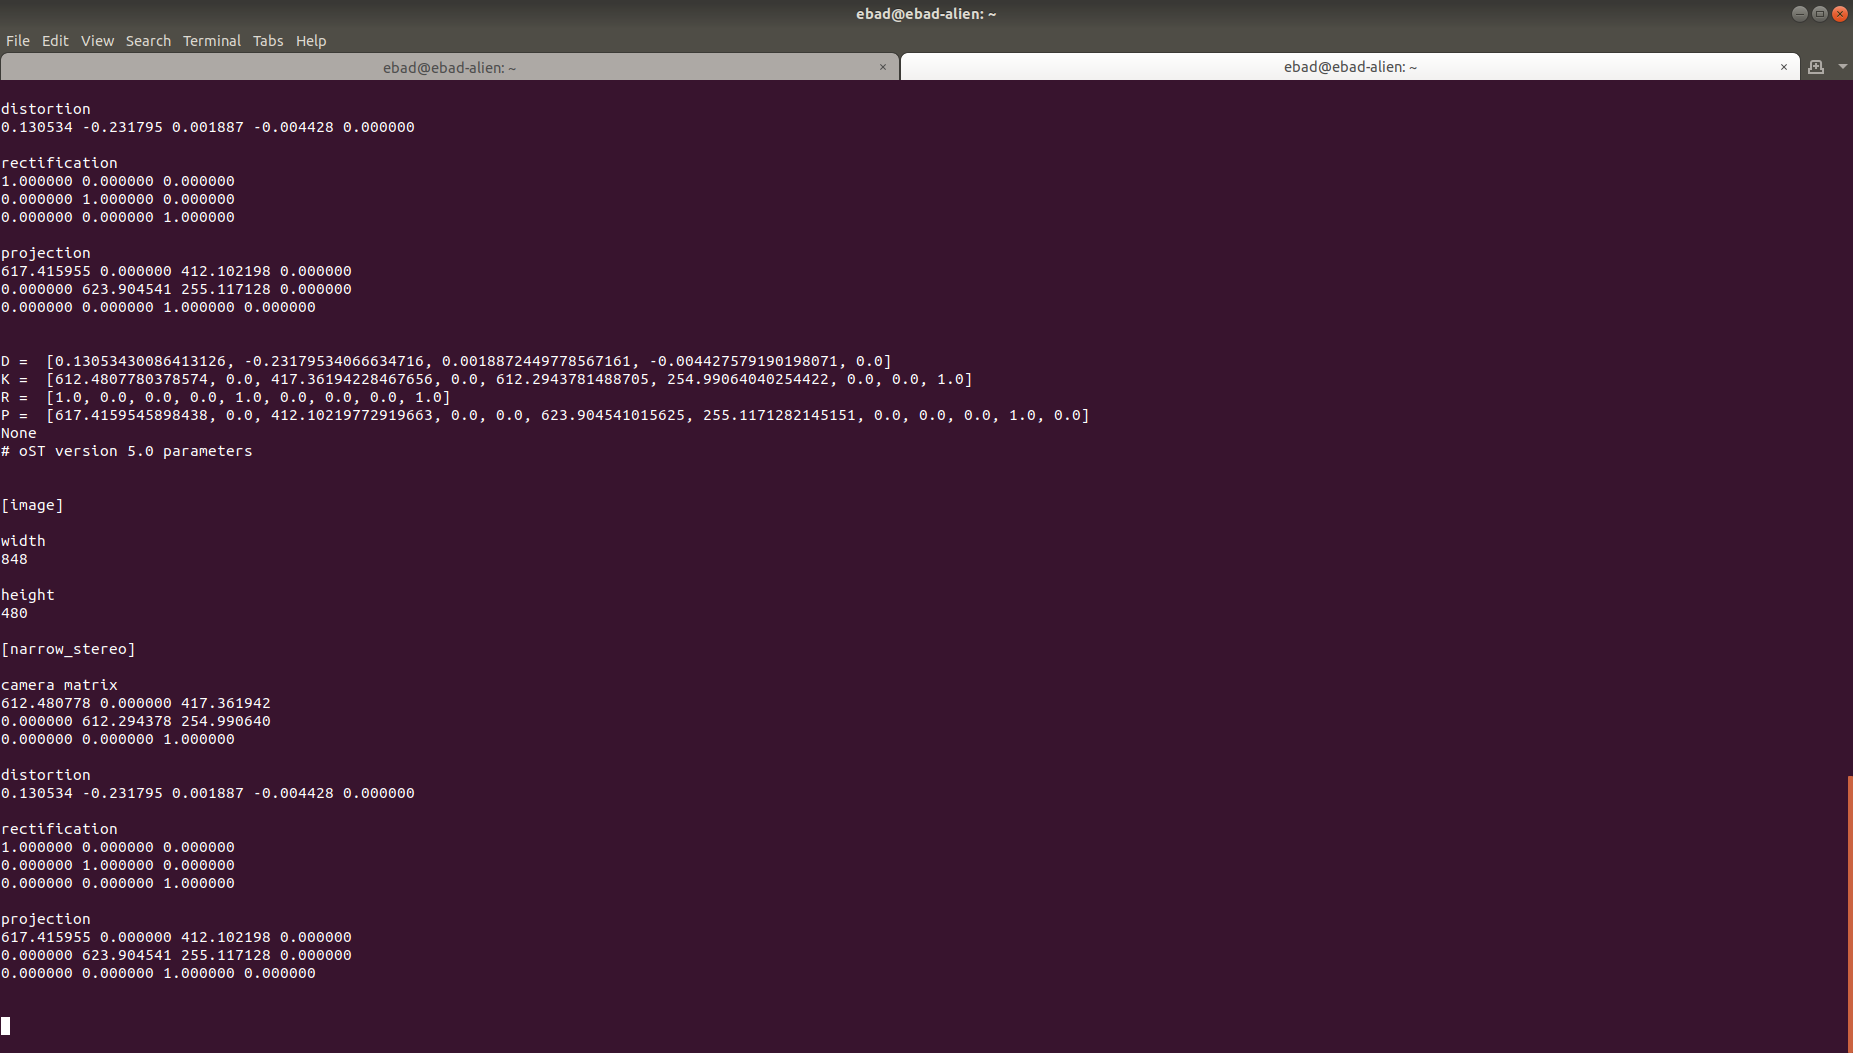
After the calibration is completed the save and commit buttons light up. And you can also see the result in terminal.
-
Press the save button to see the result. Data is saved to "/tmp/calibrationdata.tar.gz"
-
To use the the calibration file unzip the calibration.tar.gz
tar -xvf calibration.tar.gz -
In the folder images used for calibration are available and also "ost.yaml" and "ost.txt". You can use the yaml file which contains the calibration parameters as directed by the camera driver.