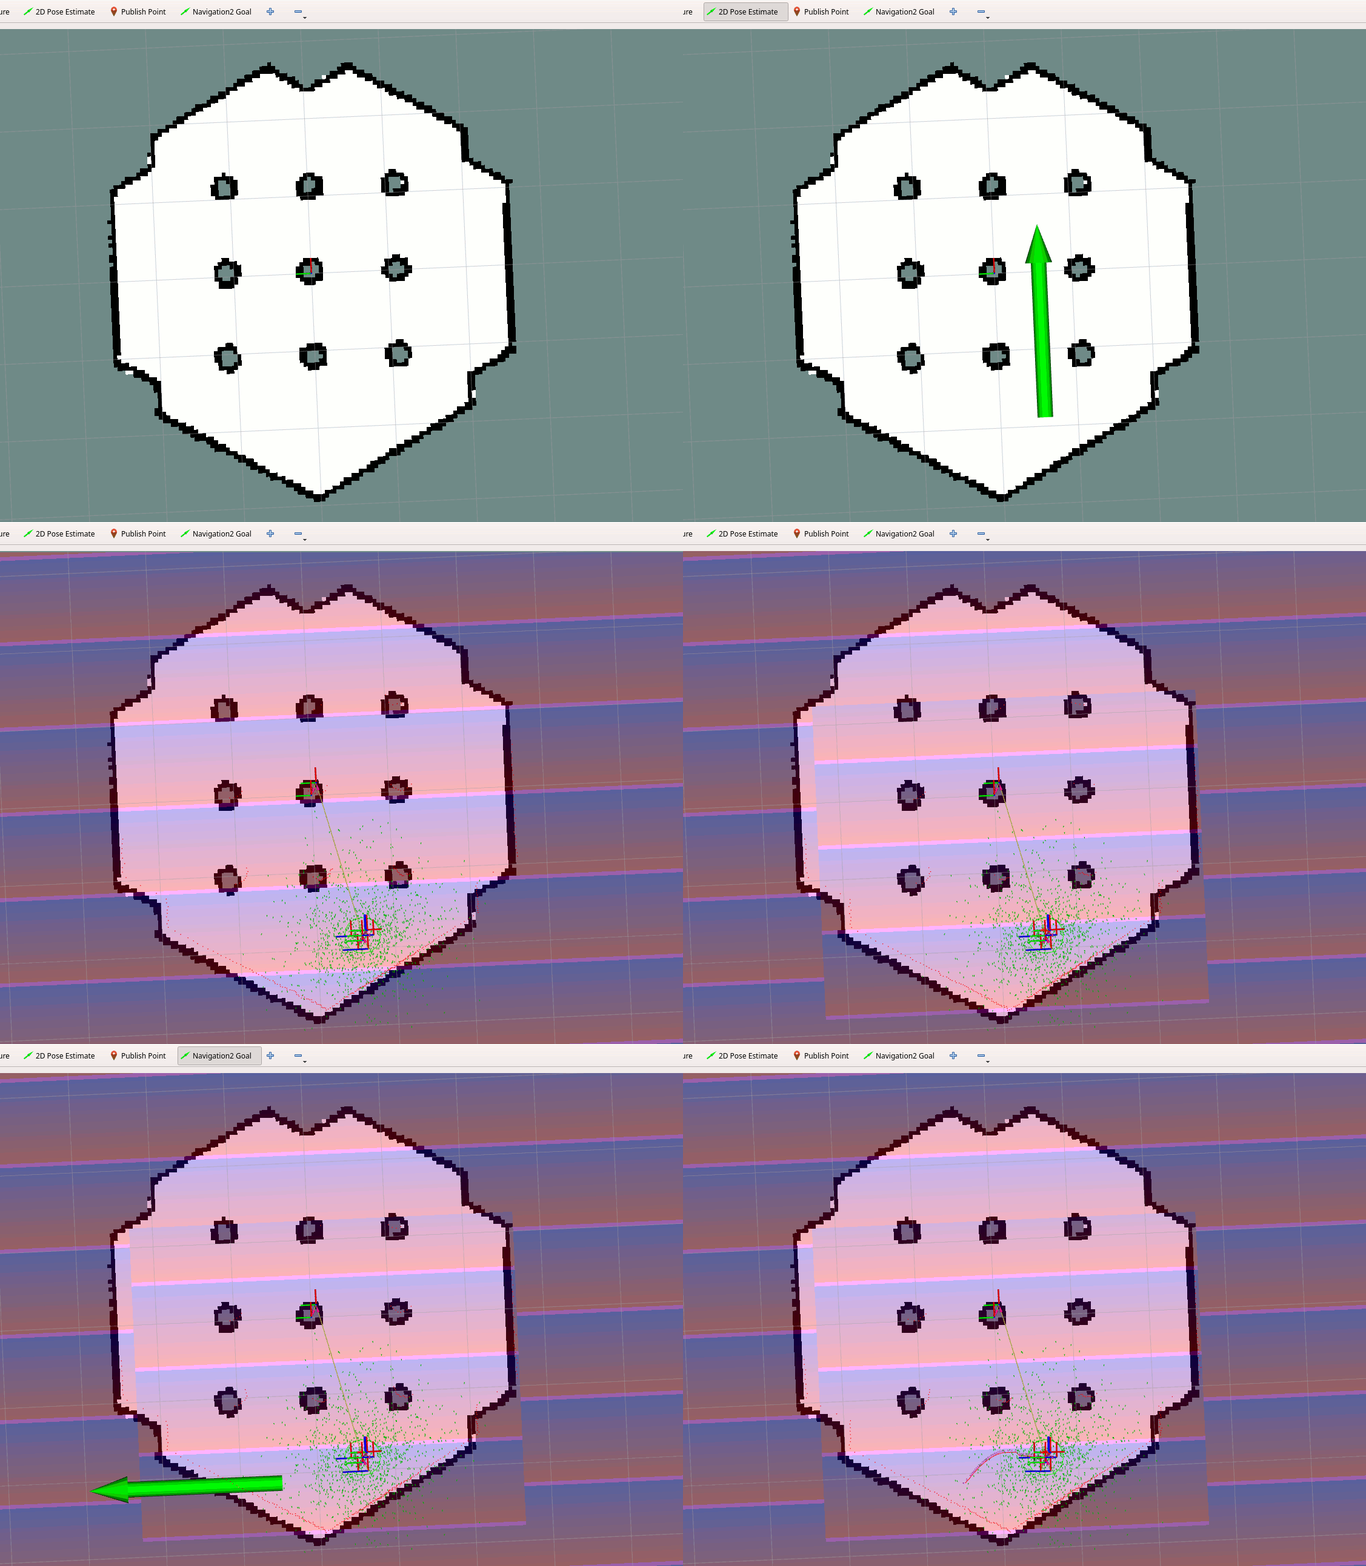
Writing a New Costmap2D Plugin

Overview
This tutorial shows how to create your own simple plugin for Costmap2D.
Before starting the tutorial, please check this video which contains information about Costmap2D layers design and plugins basic operational principals.
Requirements
It is assumed that ROS 2, Gazebo and TurtleBot3 packages are installed or built locally. Please make sure that Nav2 project is also built locally as it was made in Build and Install.
Tutorial Steps
1- Write a new Costmap2D plugin
For a demonstration, this example will create a costmap plugin that puts repeating cost gradients in the costmap.
The annotated code for this tutorial can be found in navigation2_tutorials repository as the nav2_gradient_costmap_plugin ROS 2-package.
Please refer to it when making your own layer plugin for Costmap2D.
The plugin class nav2_gradient_costmap_plugin::GradientLayer is inherited from basic class nav2_costmap_2d::Layer:
namespace nav2_gradient_costmap_plugin
{

class GradientLayer : public nav2_costmap_2d::Layer
The basic class provides the set of virtual methods API for working with costmap layers in a plugin. These methods are called at runtime by LayeredCostmap. The list of methods, their description, and necessity to have these methods in plugin’s code is presented in the table below:
Virtual method |
Method description |
Requires override? |
onInitialize() |
Method is called at the end of plugin initialization. There is usually declarations of ROS parameters. This is where any required initialization should occur. |
No |
updateBounds() |
Method is called to ask the plugin: which area of costmap layer it needs to update. The method has 3 input parameters: robot position and orientation, and 4 output parameters: pointers to window bounds. These bounds are used for performance reasons: to update the area inside the window where new info is available, avoiding updates of the whole costmap on every iteration. |
Yes |
updateCosts() |
Method is called each time when costmap re-calculation is required. It
updates the costmap layer only within its bounds window. The method has 4
input parameters: calculation window bounds, and 1 output parameter:
reference to a resulting costmap |
Yes |
matchSize() |
Method is called each time when map size was changed. |
No |
onFootprintChanged() |
Method is called each time when footprint was changed. |
No |
reset() |
It may have any code to be executed during costmap reset. |
Yes |
In our example these methods have the following functionality:
GradientLayer::onInitialize()contains declaration of a ROS parameter with its default value:
declareParameter("enabled", rclcpp::ParameterValue(true));
node_->get_parameter(name_ + "." + "enabled", enabled_);
and sets need_recalculation_ bounds recalculation indicator:
need_recalculation_ = false;
GradientLayer::updateBounds()re-calculates window bounds ifneed_recalculation_istrueand updates them regardless ofneed_recalculation_value.GradientLayer::updateCosts()- in this method the gradient is writing directly to the resulting costmapmaster_gridwithout merging with previous layers. This is equal to working with internalcostmap_and then callingupdateWithTrueOverwrite()method. Here is the gradient making algorithm for master costmap:
int gradient_index;
for (int j = min_j; j < max_j; j++) {
  // Reset gradient_index each time when reaching the end of re-calculated window
  // by OY axis.
  gradient_index = 0;
  for (int i = min_i; i < max_i; i++) {
    int index = master_grid.getIndex(i, j);
    // setting the gradient cost
    unsigned char cost = (LETHAL_OBSTACLE - gradient_index*GRADIENT_FACTOR)%255;
    if (gradient_index <= GRADIENT_SIZE) {
      gradient_index++;
    } else {
      gradient_index = 0;
    }
    master_array[index] = cost;
  }
}
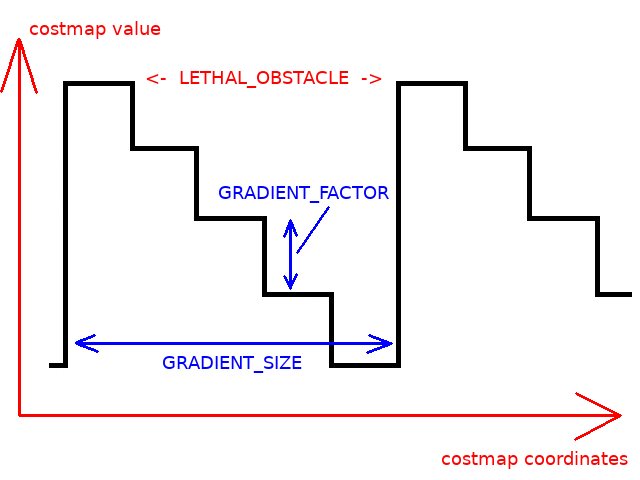
where the GRADIENT_SIZE is the size of each gradient period in map cells, GRADIENT_FACTOR - decrement of costmap’s value per each step:

These parameters are defined in plugin’s header file.
GradientLayer::onFootprintChanged()just resetsneed_recalculation_value.GradientLayer::reset()method is dummy: it is not used in this example plugin. It remains there since pure virtual functionreset()in parentLayerclass required to be overridden.
2- Export and make GradientLayer plugin
The written plugin will be loaded at runtime as its basic parent class and then will be called by plugin handling modules (for costmap2d by LayeredCostmap). Pluginlib opens a given plugin in run-time and provides methods from exported classes to be callable. The mechanism of class exporting tells pluginlib which basic class should be used during these calls. This allows to extend an application by plugins without knowing application source code or recompiling it.
In our example the nav2_gradient_costmap_plugin::GradientLayer plugin’s class should be dynamically loaded as a nav2_costmap_2d::Layer basic class. For this the plugin should be registered as follows:
Plugin’s class should be registered with a basic type of loaded class. For this there is a special macro
PLUGINLIB_EXPORT_CLASSshould be added to any source-file composing the plugin library:
#include "pluginlib/class_list_macros.hpp"
PLUGINLIB_EXPORT_CLASS(nav2_gradient_costmap_plugin::GradientLayer, nav2_costmap_2d::Layer)
This part is usually placed at the end of cpp-file where the plugin class was written (in our example gradient_layer.cpp). It is good practice to place these lines at the end of the file, but technically, you can also place at the top.
Plugin’s information should be stored to the plugin’s description file. This is done by using separate XML (in our example
gradient_plugins.xml) in the plugin’s package. This file contains information about:
path: Path and name of library where plugin is placed.
name: Plugin type referenced inplugin_typesparameter (see next section for more details). It could be whatever you want.
type: Plugin class with namespace taken from the source code.
basic_class_type: Basic parent class from which plugin class was derived.
description: Plugin description in a text form.
<library path="nav2_gradient_costmap_plugin_core">
  <class type="nav2_gradient_costmap_plugin::GradientLayer" base_class_type="nav2_costmap_2d::Layer">
    <description>This is an example plugin which puts repeating costs gradients to costmap</description>
  </class>
</library>
The export of plugin is performed by including pluginlib_export_plugin_description_file() cmake-function into CMakeLists.txt. This function installs plugin description file into share directory and sets ament indexes for plugin description XML to be discoverable as a plugin of selected type:
pluginlib_export_plugin_description_file(nav2_costmap_2d gradient_layer.xml)
Plugin description file is also should be added to package.xml. costmap_2d is the package of the interface definition, for our case Layer, and requires a path to the xml file:
<export>
  <costmap_2d plugin="${prefix}/gradient_layer.xml" />
  ...
</export>
After everything is done put the plugin package into src directory of a certain ROS 2-workspace, build the plugin package (colcon build --packages-select nav2_gradient_costmap_plugin --symlink-install) and source setup.bash file when it necessary.
Now the plugin is ready to use. You can verify that it has been successfully registered by running:
$ ros2 plugin list
You should see an output similar to below:
nav2_gradient_costmap_plugin:
      Plugin(name='nav2_gradient_costmap_plugin::GradientLayer', type='nav2_gradient_costmap_plugin::GradientLayer', base='nav2_costmap_2d::Layer')
3- Enable the plugin in Costmap2D
At the next step it is required to tell Costmap2D about new plugin. For that the plugin should be added to plugin_names and plugin_types lists in nav2_params.yaml optionally for local_costmap/global_costmap in order to be enabled in run-time for Controller/Planner Server. plugin_names list contains the names of plugin objects. These names could be anything you want. plugin_types contains types of listed in plugin_names objects. These types should correspond to name field of plugin class specified in plugin description XML-file.
Note
For Galactic or later, plugin_names and plugin_types have been replaced with a single plugins string vector for plugin names. The types are now defined in the plugin_name namespace in the plugin: field (e.g. plugin: MyPlugin::Plugin). Inline comments in the code blocks will help guide you through this.
For example:
--- a/nav2_bringup/bringup/params/nav2_params.yaml
+++ b/nav2_bringup/bringup/params/nav2_params.yaml
@@ -124,8 +124,8 @@ local_costmap:
       width: 3
       height: 3
       resolution: 0.05
-      plugins: ["obstacle_layer", "voxel_layer", "inflation_layer"]
+      plugins: ["obstacle_layer", "voxel_layer", "gradient_layer"]
       robot_radius: 0.22
       inflation_layer:
         cost_scaling_factor: 3.0
@@ -171,8 +171,8 @@ global_costmap:
       robot_base_frame: base_link
       global_frame: map
-      plugins: ["static_layer", "obstacle_layer", "voxel_layer", "inflation_layer"]
+      plugins: ["static_layer", "obstacle_layer", "voxel_layer", "gradient_layer"]
       robot_radius: 0.22
       resolution: 0.05
       obstacle_layer:
YAML-file may also contain the list of parameters (if any) for each plugin, identified by plugins object name.
NOTE: there could be many simultaneously loaded plugin objects of one type. For this, plugin_names list should contain different plugins names whether the plugin_types will remain the same types. For example:
plugins: ["obstacle_layer", "gradient_layer_1", "gradient_layer_2"]
In this case each plugin object will be handled by its own parameters tree in a YAML-file, like:
gradient_layer_1:
  plugin: nav2_gradient_costmap_plugin::GradientLayer # In Iron and older versions, "/" was used instead of "::"
  enabled: True
  ...
gradient_layer_2:
  plugin: nav2_gradient_costmap_plugin::GradientLayer # In Iron and older versions, "/" was used instead of "::"
  enabled: False
  ...
Note
The order in which plugins are listed in the configuration is significant, as it determines the sequence in which they are applied to the costmap. For example, if the inflation layer is listed before the range layer, obstacles added to the costmap by the range layer will not be inflated.
4- Run GradientLayer plugin
Run Turtlebot3 simulation with enabled Nav2. Detailed instructions how to make it are written at Getting Started. Below is shortcut command for that:
$ ros2 launch nav2_bringup tb3_simulation_launch.py
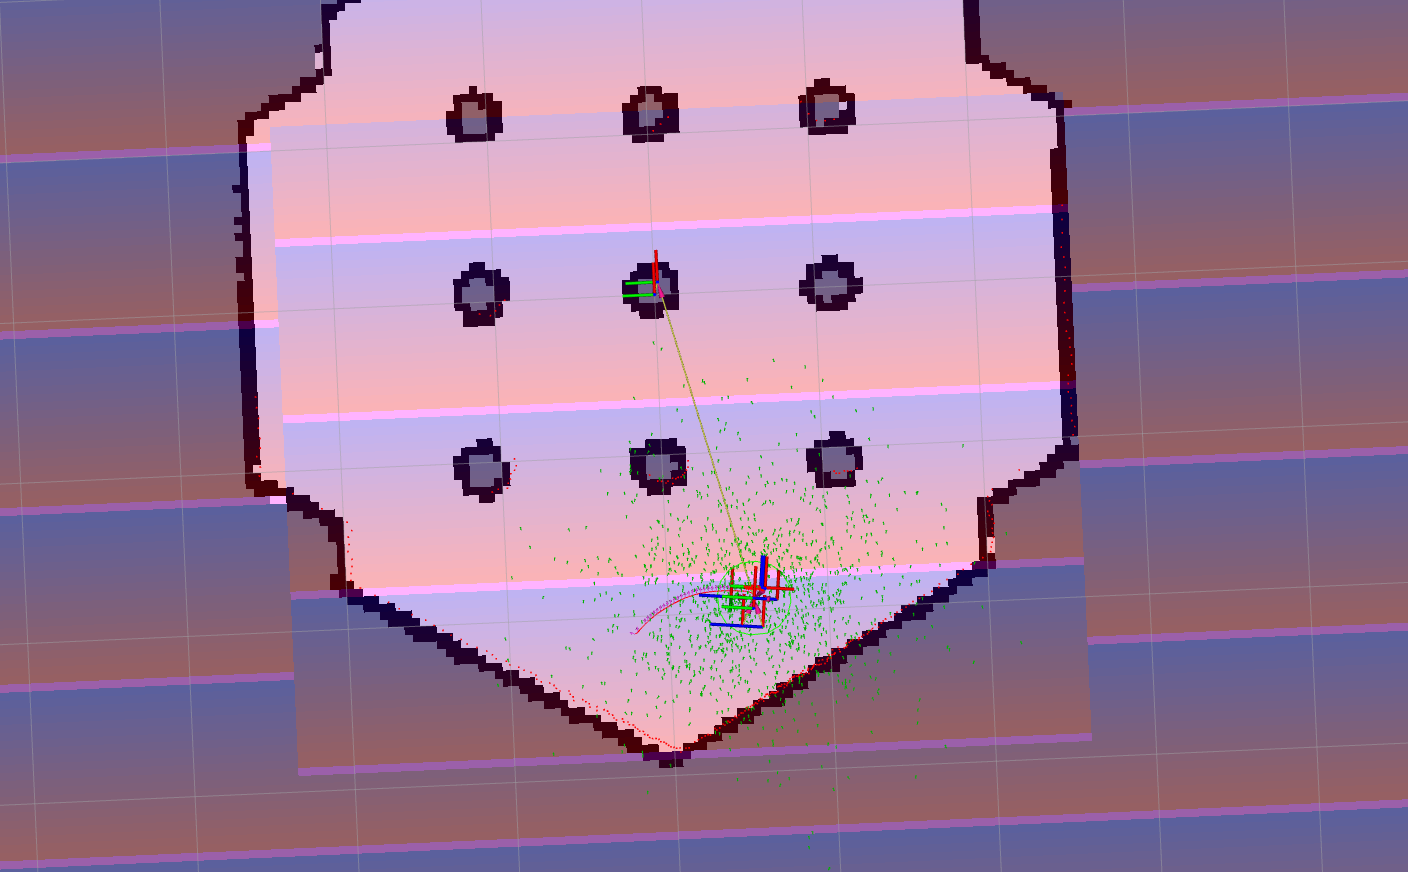
Then goto RViz and click on the “2D Pose Estimate” button at the top and point the location on map as it was described in Getting Started. Robot will be localized on map and the result should be as presented at picture below. There, the gradient costmap can be seen. There are also 2 noticeable things: dynamically updated by GradientLayer::updateCosts() costmap within its bounds and global path curved by gradient:
