Navigating while Mapping (SLAM)
Overview
This document explains how to use Nav2 with SLAM. The following steps show ROS 2 users how to generate occupancy grid maps and use Nav2 to move their robot around. This tutorial applies to both simulated and physical robots, but will be completed here on a physical robot.
Before completing this tutorial, completing the Getting Started is highly recommended especially if you are new to ROS and Navigation2.
In this tutorial we’ll be using SLAM Toolbox. More information can be found in the ROSCon talk for SLAM Toolbox
Requirements
You must install Navigation2, Turtlebot3, and SLAM Toolbox. If you don’t have them installed, please follow Getting Started.
First, source your ROS 2 installation to set the environment variables:
source /opt/ros/<ros2-distro>/setup.bash
SLAM Toolbox can be installed via:
sudo apt install ros-$ROS_DISTRO-slam-toolbox
or from built from source in your workspace with:
git clone -b $ROS_DISTRO-devel git@github.com:stevemacenski/slam_toolbox.git
Tutorial Steps
0- Launch Robot Interfaces
For this tutorial, we will use the turtlebot3. The turtlebot3 software can be installed via the following or on the turtlebot3 repository:
First, source your ROS 2 installation to set the environment variables:
source /opt/ros/<ros2-distro>/setup.bash
Then install the Turtlebot3 packages:
sudo apt install ros-$ROS_DISTRO-turtlebot3 ros-$ROS_DISTRO-turtlebot3-msgs ros-$ROS_DISTRO-turtlebot3-bringup
If you have another robot, replace with your robot specific interfaces. Typically, this includes the robot state publisher of the URDF, simulated or physical robot interfaces, controllers, safety nodes, and the like.
Run the following commands first whenever you open a new terminal during this tutorial.
source /opt/ros/<ros2-distro>/setup.bashexport TURTLEBOT3_MODEL=waffle
Launch your robot’s interface and robot state publisher, for example:
ros2 launch turtlebot3_bringup robot.launch.py
1- Launch Navigation2
Launch Navigation without nav2_amcl and nav2_map_server. It is assumed that the SLAM node(s) will publish to /map topic and provide the map->odom transform.
ros2 launch nav2_bringup navigation_launch.py
2- Launch SLAM
Bring up your choice of SLAM implementation. Make sure it provides the map->odom transform and /map topic. Run Rviz and add the topics you want to visualize such as /map, /tf, /laserscan etc. For this tutorial, we will use SLAM Toolbox.
ros2 launch slam_toolbox online_async_launch.py
3- Working with SLAM
Move your robot by requesting a goal through RViz or the ROS 2 CLI, ie:
ros2 topic pub /goal_pose geometry_msgs/PoseStamped "{header: {stamp: {sec: 0}, frame_id: 'map'}, pose: {position: {x: 0.2, y: 0.0, z: 0.0}, orientation: {w: 1.0}}}"
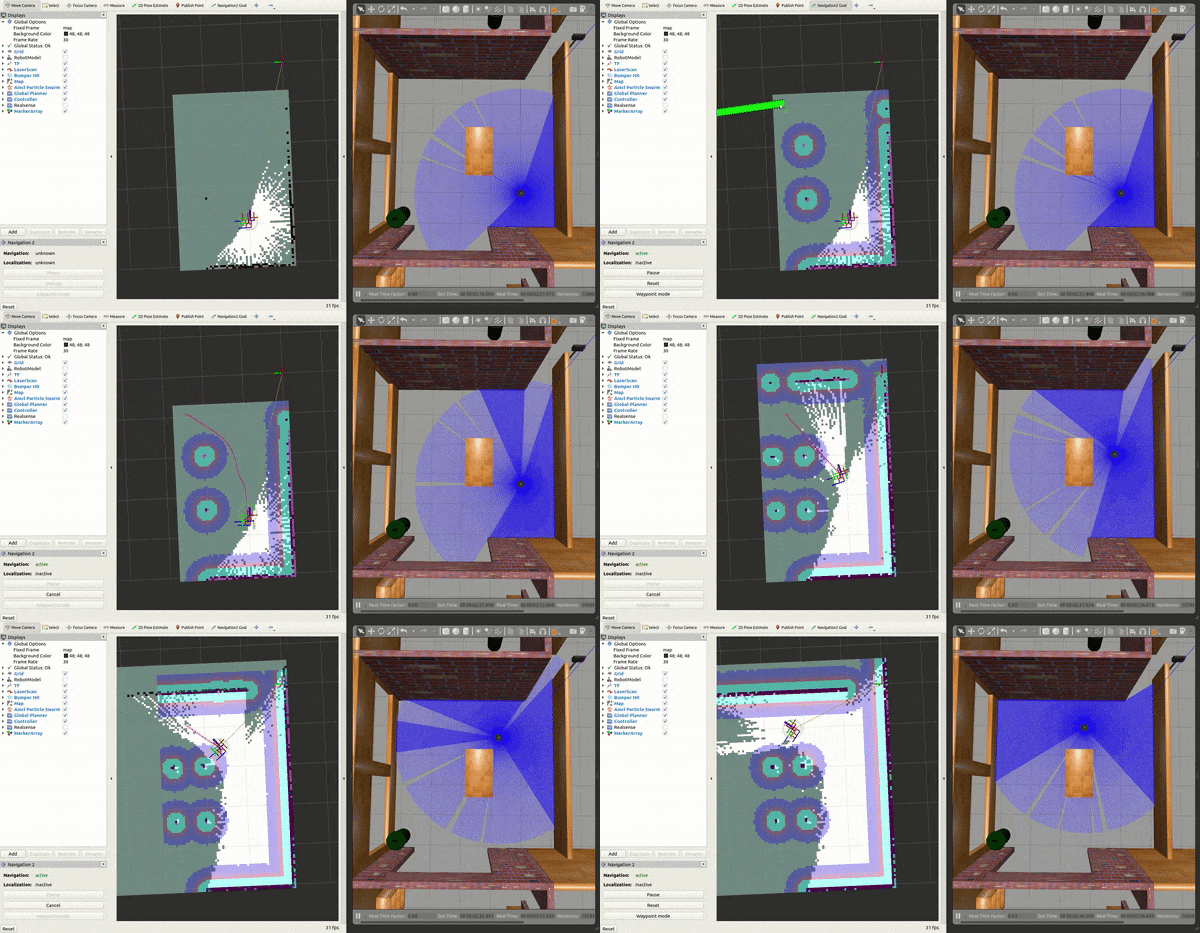
You should see the map update live! To save this map to file:
ros2 run nav2_map_server map_saver_cli -f ~/map

4- Getting Started Simplification
If you’re only interested in running SLAM in the turtlebot3 getting started sandbox world, we also provide a simple way to enable SLAM as a launch configuration.
Rather than individually launching the interfaces, navigation, and SLAM, you can continue to use the tb3_simulation_launch.py with slam config set to true.
We provide the instructions above with the assumption that you’d like to run SLAM on your own robot which would have separated simulation / robot interfaces and navigation launch files that are combined in tb3_simulation_launch.py for the purposes of easy testing.
ros2 launch nav2_bringup tb3_simulation_launch.py slam:=True