Route Graph Generation LIF Editor
Overview
A route can also be created using the VDA LIF Editor, a web-based open-source tool. This project was developed to present floor plans in a standardized format defined by the VDA. With the VDA LIF Editor, you can generate both GeoJSON and LIF formats simultaneously.
Requirements
This is an online web-based tool, so no installation is required. You can use it directly in your browser.
Tutorial Steps
1. Create Layout
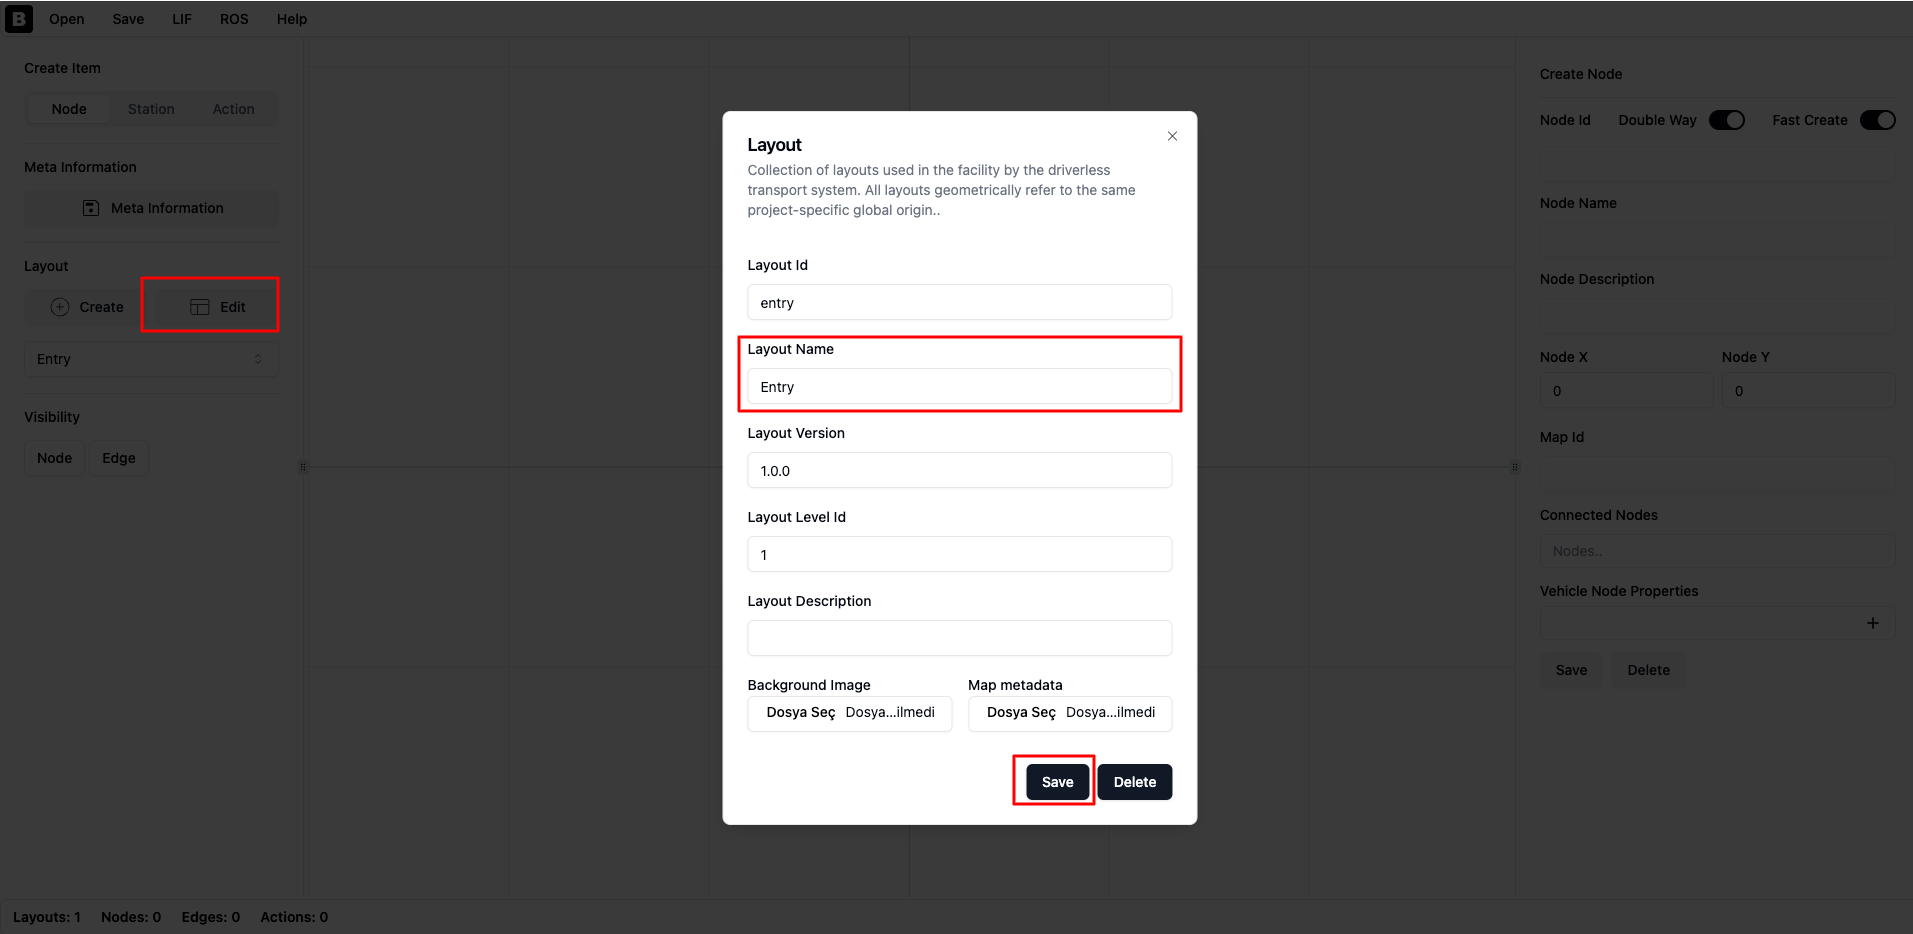
Click the ‘Edit’ button under the ‘Layout’ section in the left sidebar. This will open a new popup where you can edit the layout name. Click the ‘Save’ button to save it.
Note
You can also change the layout name after creating the layout.
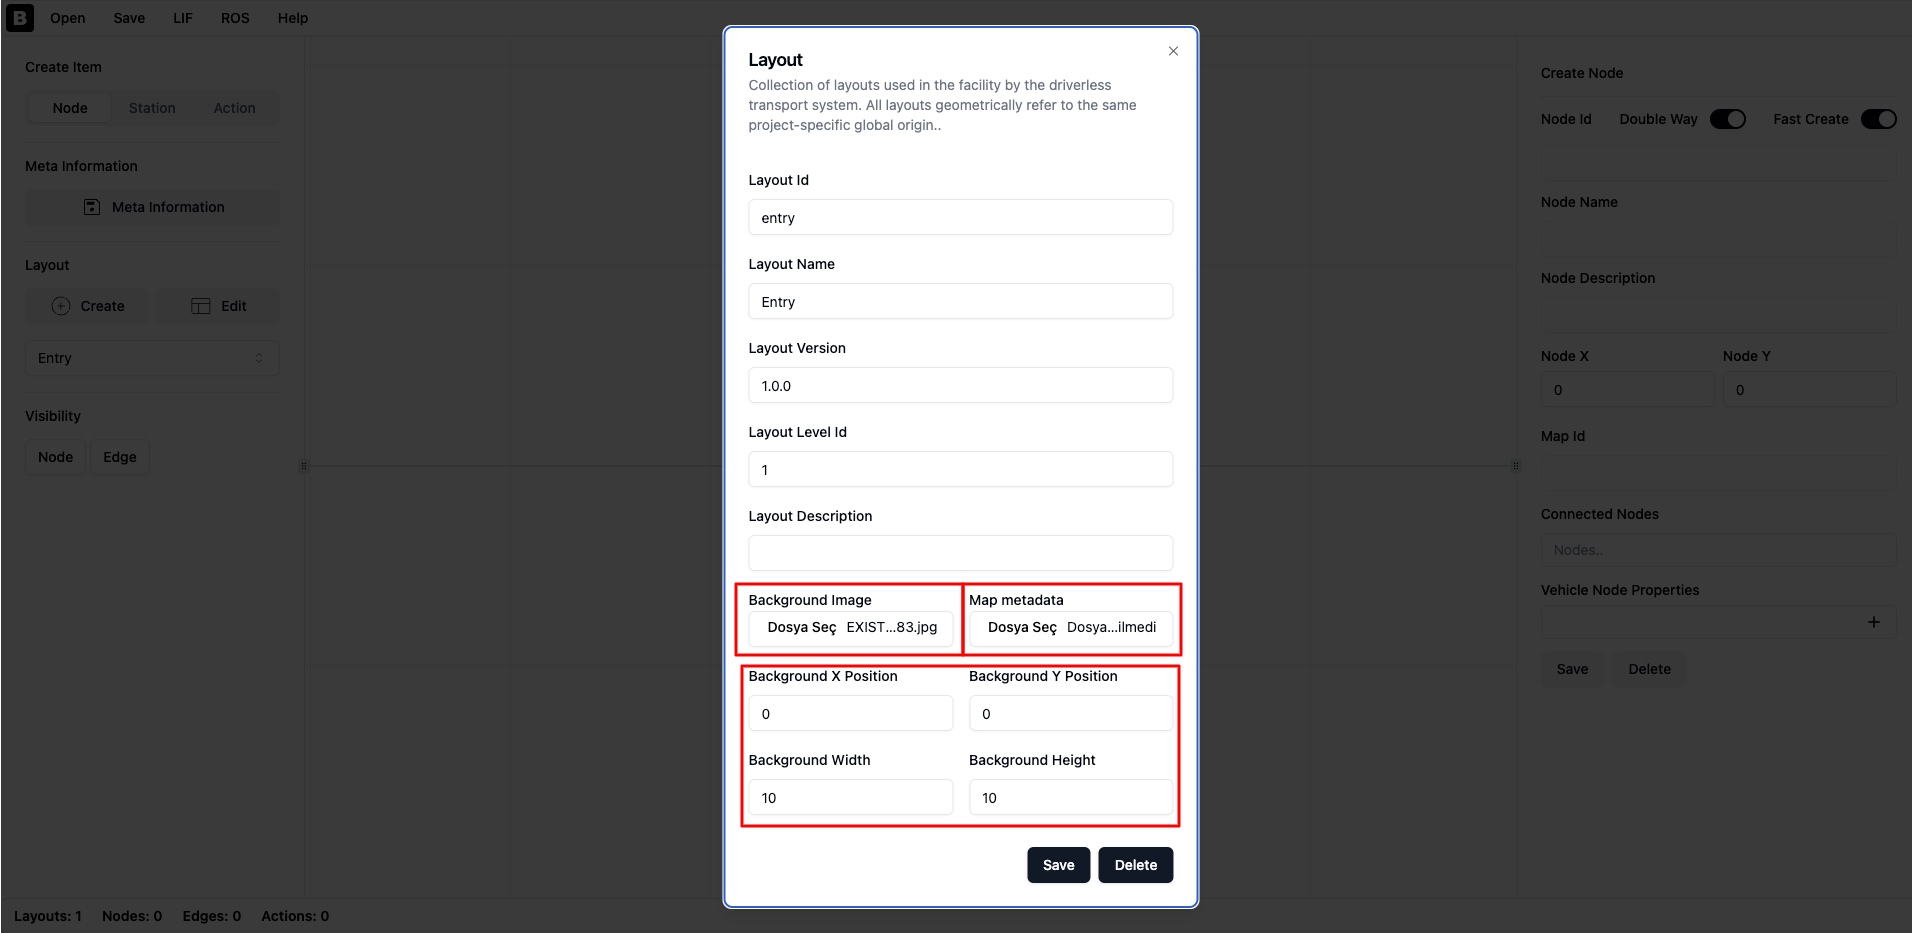
Click the ‘Edit’ button under the ‘Layout’ section in the left sidebar. In the popup, upload your floor plan image using the ‘Background Image’ section. After uploading the image, four input fields will appear. Set the image width and height in meters, and specify the origin coordinates (X, Y). The origin is the bottom-left corner of the image. Click the ‘Save’ button to save and close the popup.
Note
If you don’t see the image, zoom out the map and check the origin position of your image.
2. Node Operations
Add Node
Now you can add nodes to the map. There are two ways to do this:
Click directly on the map to add a node. This will create a node automatically. If you want to change its properties, click on the node and edit its information in the right sidebar.
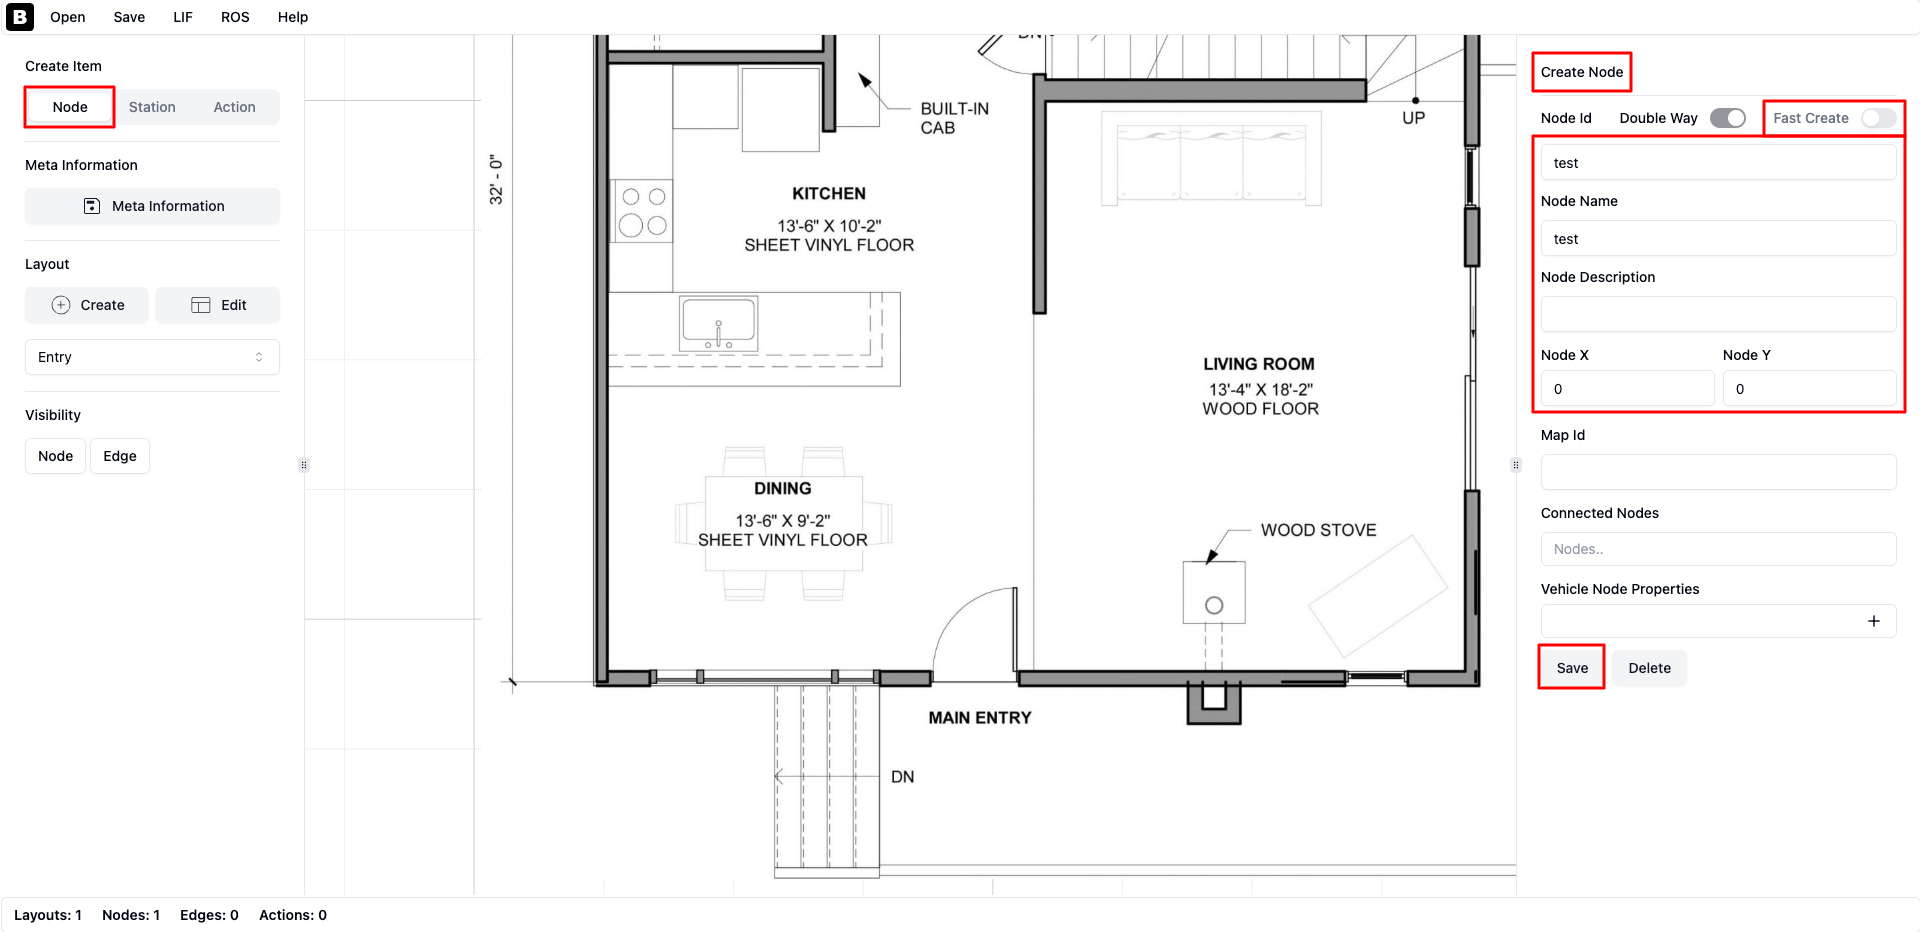
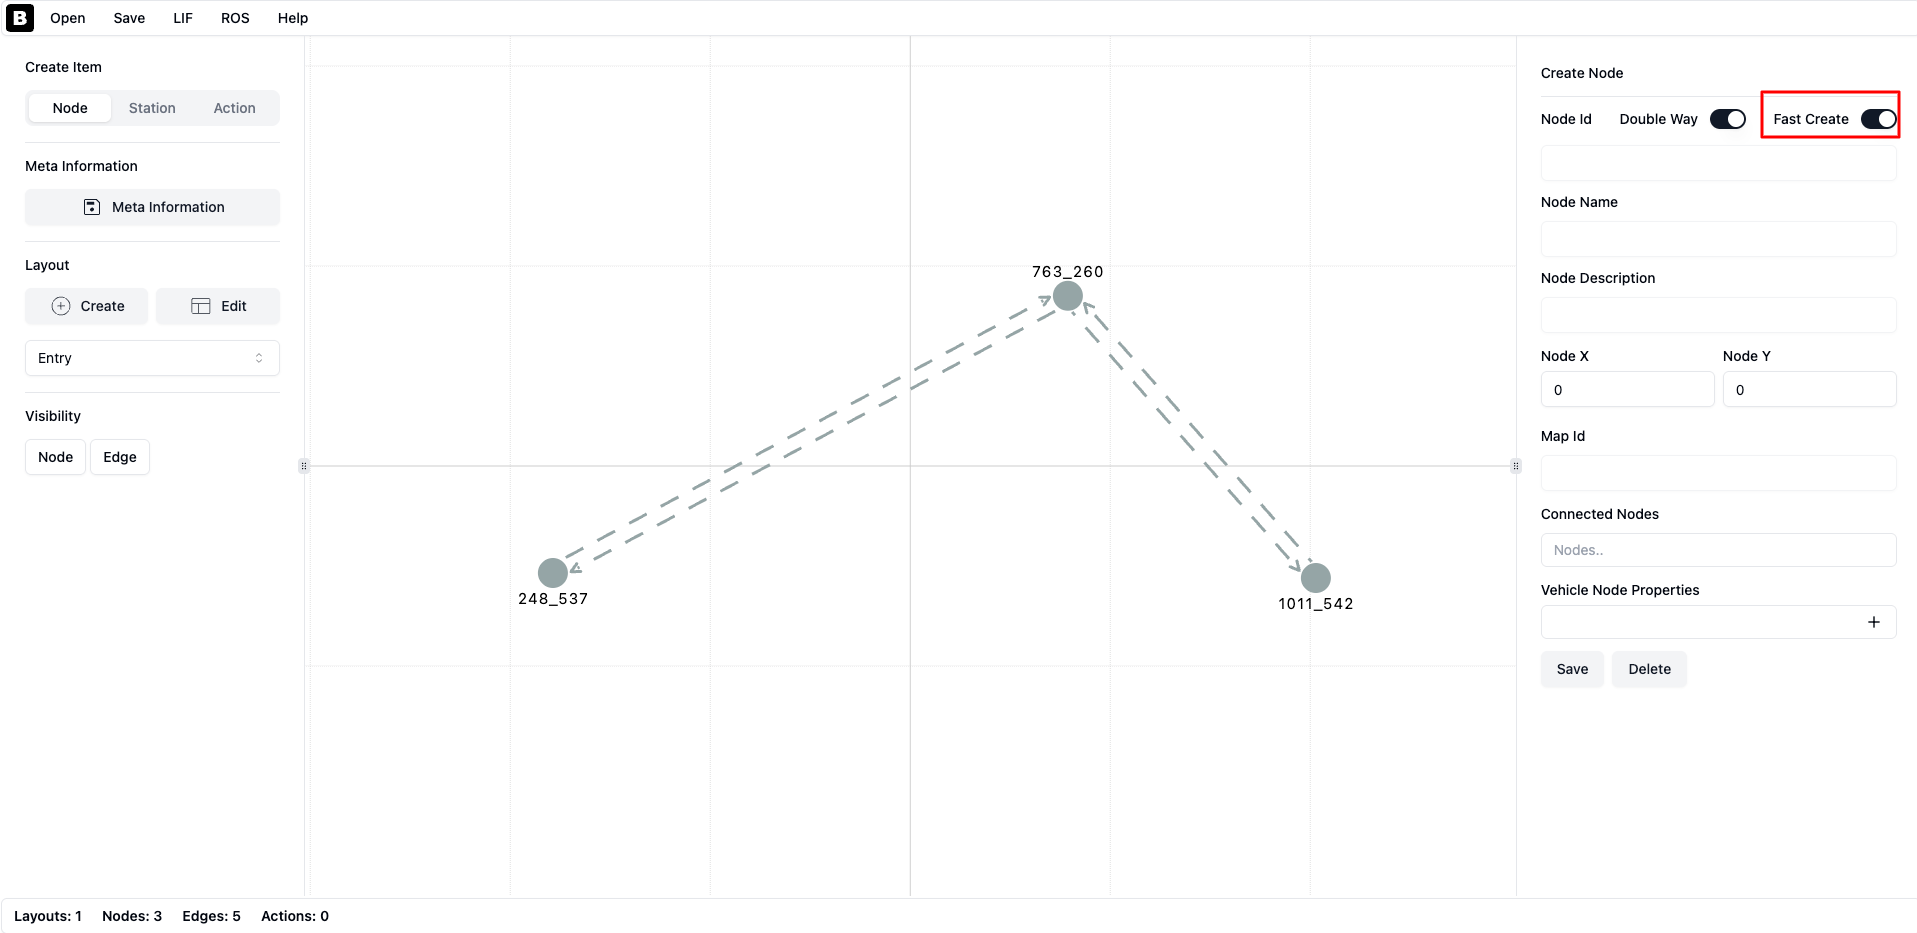
Click the ‘Node’ button under the ‘Create Item’ section in the left sidebar. This will display the ‘Create Node’ section in the right sidebar. Fill in the node details and click ‘Save’ to create the node.
Note
If the ‘Fast Create’ toggle is on, you cannot create nodes using the right sidebar (method 2). You must turn the toggle off first.
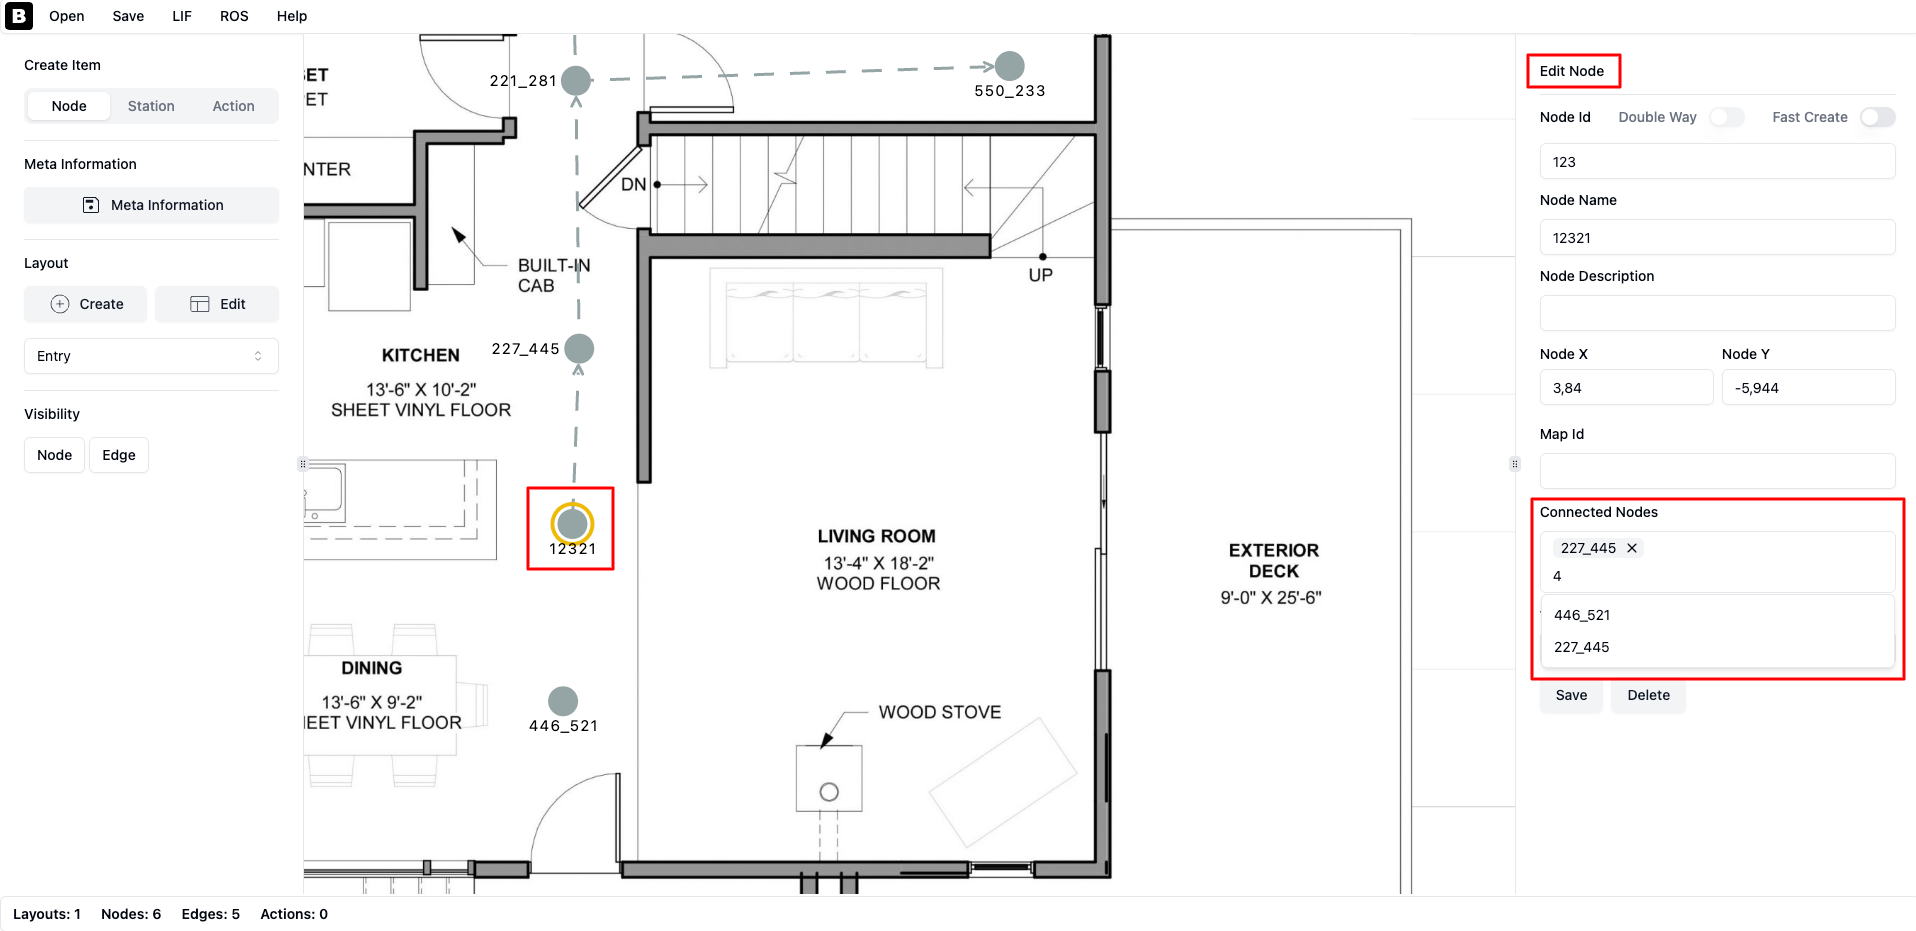
Delete Node
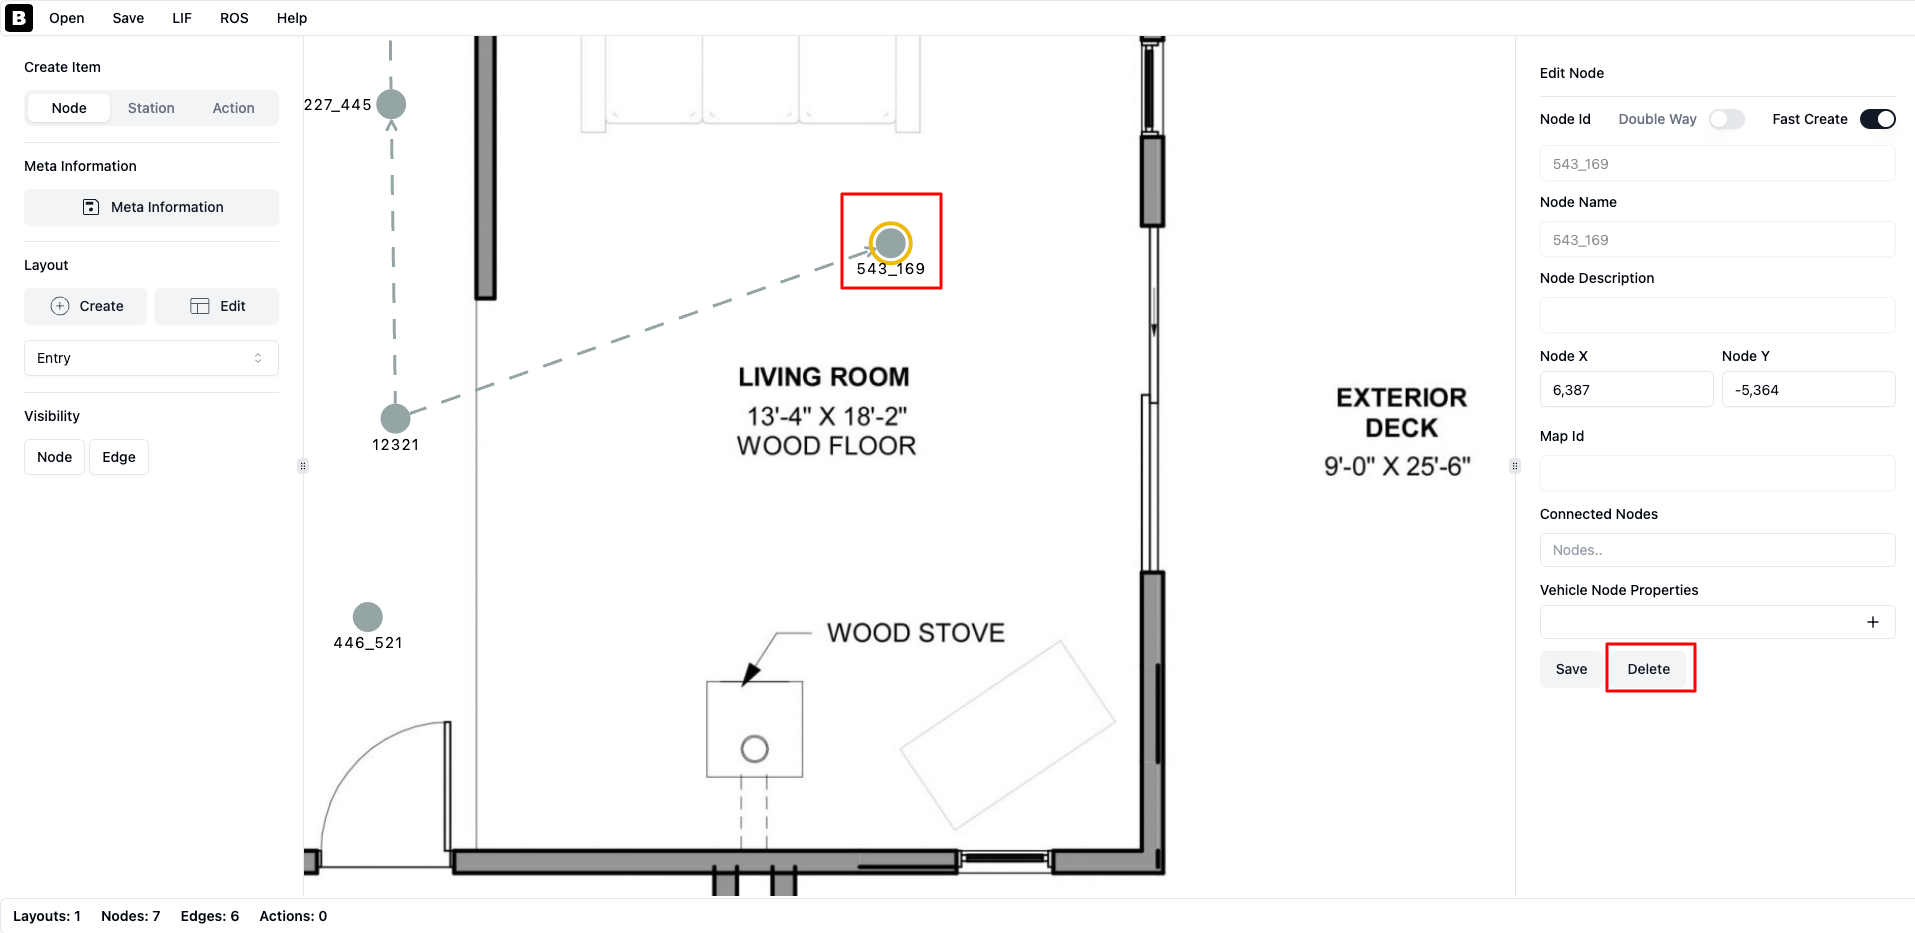
To delete a node, click on it (a glowing orange border will appear around the selected node), then click the ‘Delete’ button in the right sidebar.
3. Edge Operations
Add Edge
Now we can add edges to the map. There are two ways to create edges:
Select a node, enter the target node ID in the ‘Connected Nodes’ input in the right sidebar, and select the node from the list. This will create an edge between the selected node and the target node.
If the ‘Fast Create’ toggle is on, clicking on the map will automatically connect the new node to the previously selected node.
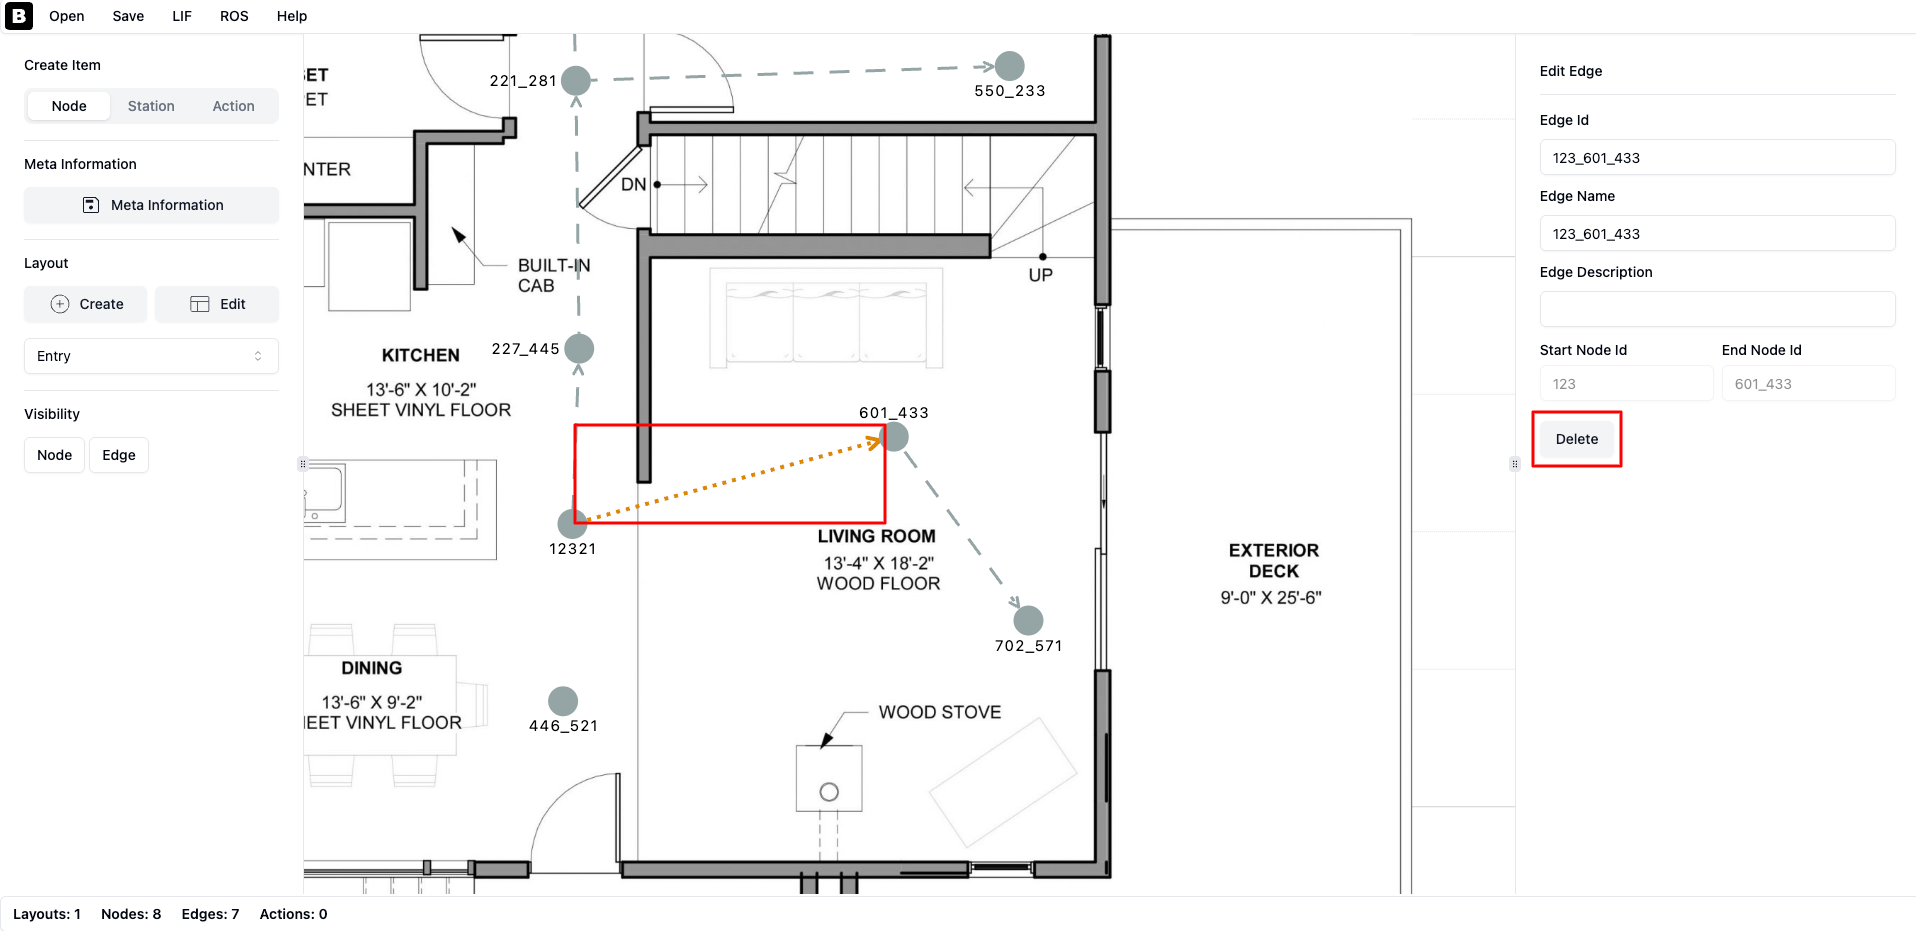
Delete Edge
To delete an edge, click on it (the edge color will change to orange), then click the ‘Delete’ button in the right sidebar.
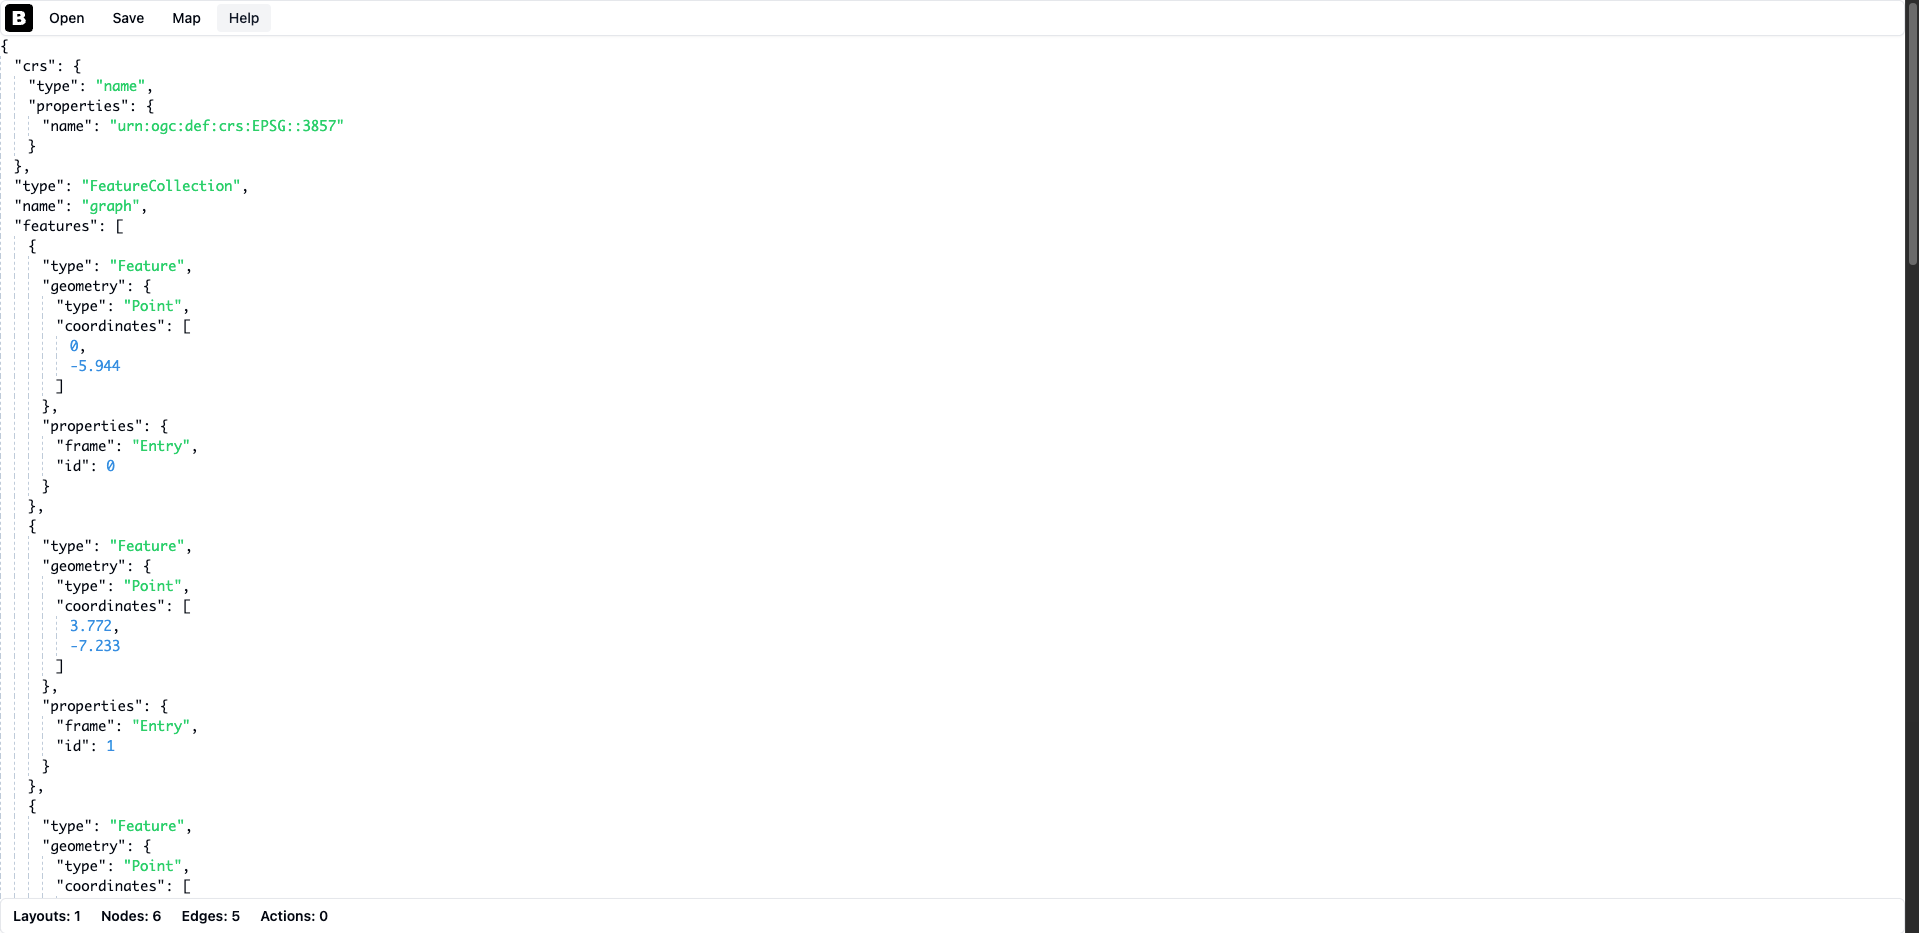
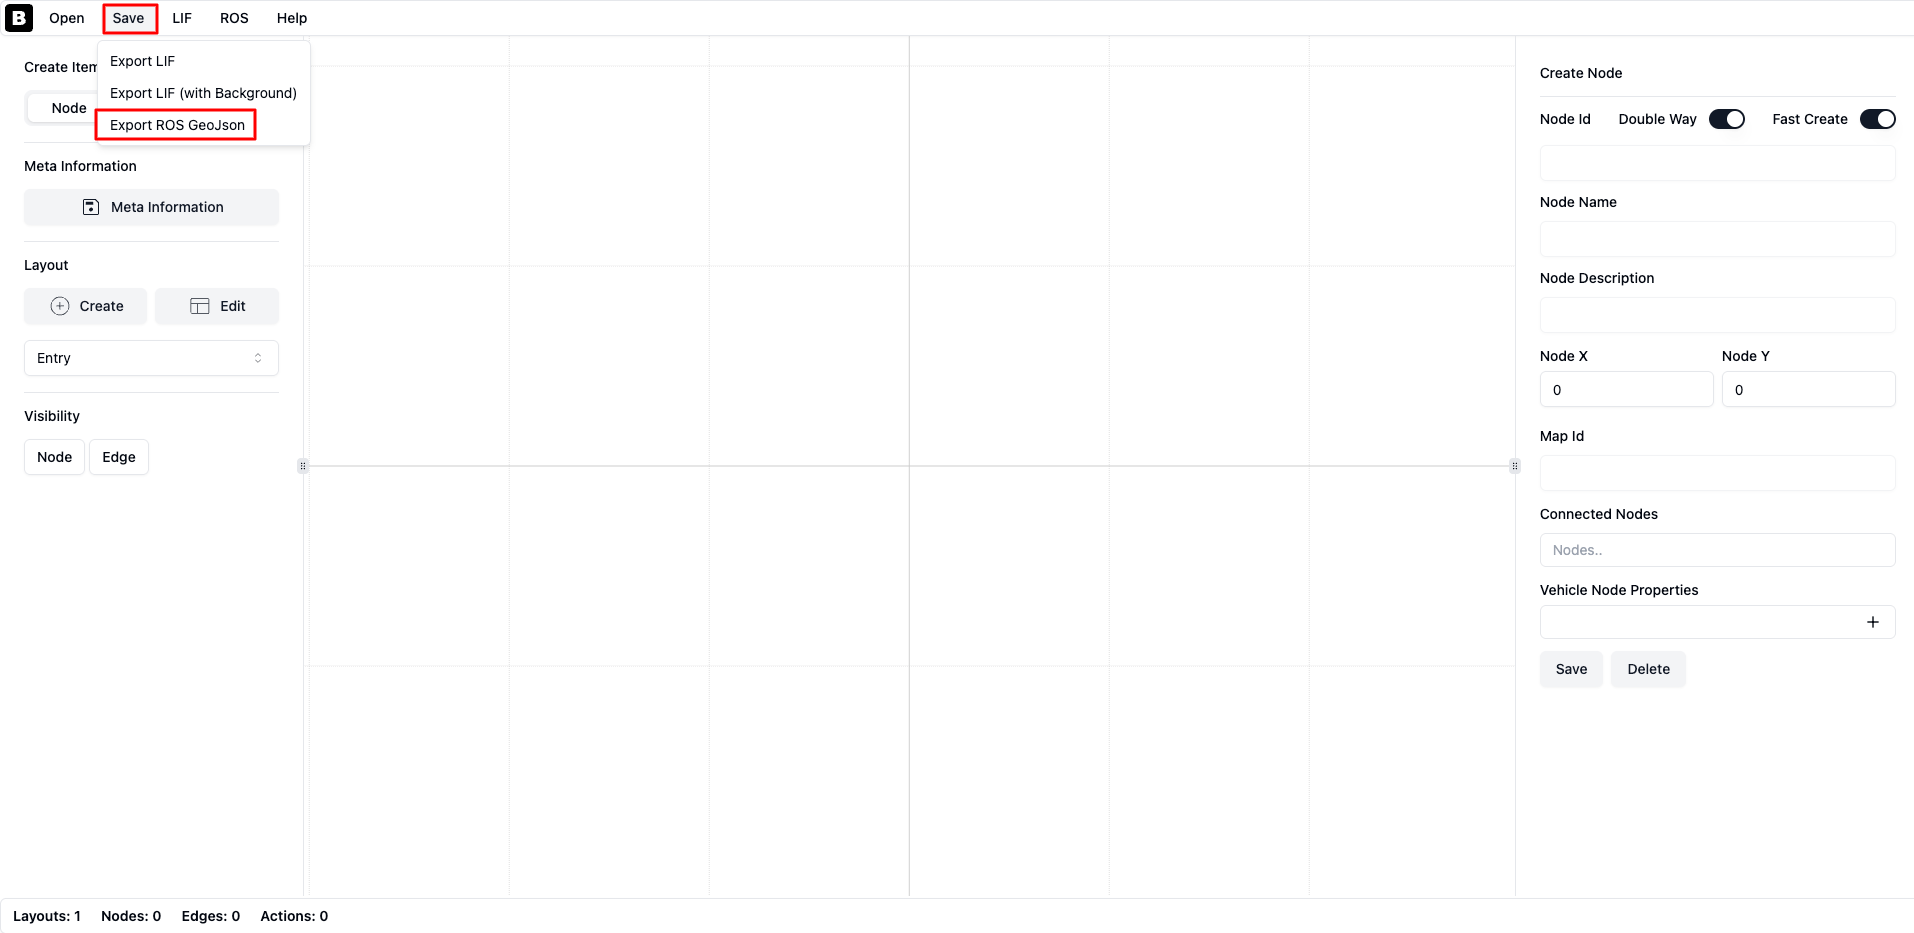
5. Export to GeoJSON
You are now ready to export the node and edge layers as GeoJSON files. Click the ‘Save’ button on the top bar and then select ‘Export ROS GeoJSON’.
6. Congratulations
Your graph is now ready to be used by the Nav2 route! If you want to edit the graph later, you should also export the LIF file. Click the ‘Save’ button on the top bar and select ‘Export LIF’. To edit, reopen the LIF file in the VDA LIF Editor and make your changes. You can also re-export the LIF file as GeoJSON.
Happy Routing!